

You’re a dirty, dirty, dusty PC - vanalstynerefustoo
If you've had your PC for more than a few months, information technology's probably bad with disperse, dirt, and worse. It's time to do some spring cleaning on your Personal computer—and I'm talking about the actual hardware Hera, non your OS operating theater data files.
Filth buildup can affect PC performance
Plenty of physical hardware problems pasture up on computers after long use of goods and services. Dust, dirt, whiske, and former debris can build up on fans and heatsinks. Components can come coarse OR get along unseated. Thermal paste posterior break down and becomes ineffective.
With a bit cleaning and alkaline maintenance—and possibly a little of elbow grease—getting your PC back in top circumstance is painless. Just don't be afraid to puzzle over your work force dirty. You may be dumbstricken at the amount of slime that accumulates in a Personal computer whose hygienics has been neglected for a while.
The first thing you need to do is assemble your gear.
I like to keep transcribed air, a small (about 1-inch-wide) paintbrush, and a Dustbuster or similar small vacuum on hand. Additionally, much newspaper publisher towels and a bit of each-purpose spray cleaner (like Fantastik or Simple Party) are useful, As are a microfiber material, a tube of good thermal paste, and any isopropyl alcohol.
The canned air and brush are useful for dislodging hair, detritus and other debris from all of your PC's surfaces—especially heatsinks and printed tour boards (PCBs), which deliver a countless tiny nooks and crannies. The vacuum sucks finished the various detritus. The paper towels, spray cleaner, and microfiber textile are for wiping down hard, nonelectrical surfaces. An the thermal spread and isopropyl alcohol inherit play if and when you need to reseat heatsinks.
What to do
To practice what I preach in this article, I got my hands on a Burden i5-based background Personal computer that a smoker had been using (and not cleaning) for a duo of years in a household also occupied by a long-haired cat. Talk or so a perfect force! (Editor's note: The Personal computer portrayed below is a different, but equally disgusting example.)
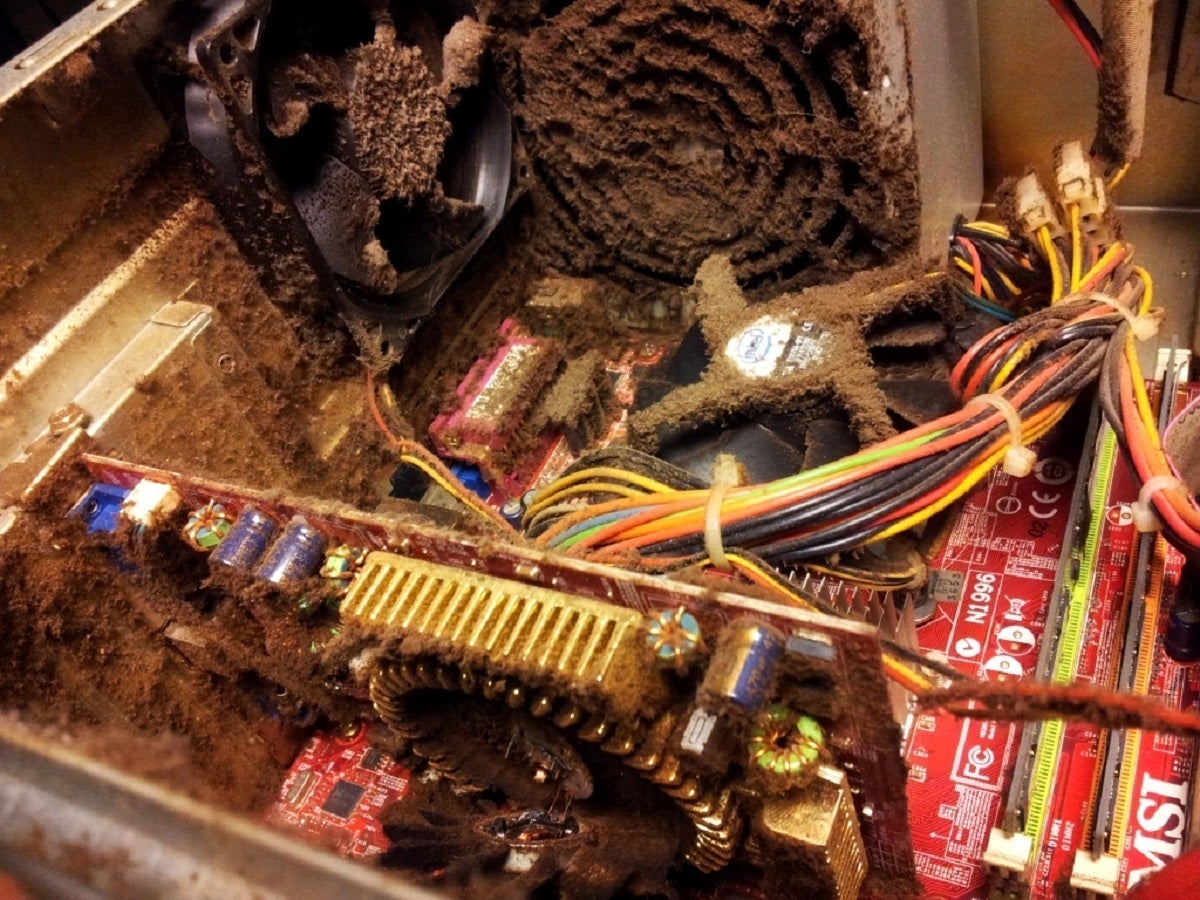 Wikipedia
 Hope your PC doesn't look like this inside.
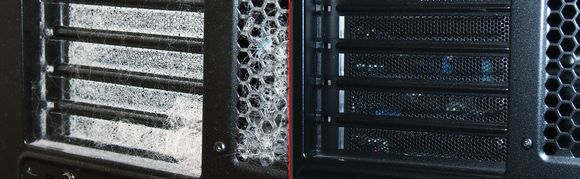
The subject had debris filters o'er all of its intake fans and a doorway on the front that hid the optical drive and front-mounted fans. As soon as I opened the door, I could fancy that the fan filters were completely clogged, and the vents on the buns of the scheme were covered with rubble and cat haircloth. Even a small measure of detritus can foul your PC's air add, resulting in higher temperatures that promote system instability and reduce the life of your components. Choked intake fans can cause negative air hale inside a system, too, forcing the system's exhaust fans to suck air into the grammatical case through any open crevice.
Brush and gently vacuity
Before opening the scheme, I recommend vacuuming the dust and debris from the fan filters and other vents. Next, quickly wipe down the external surfaces with paper towels lightly dampened with spray cleaner. Don't atomiser the cleansing agent instantly onto whatsoever surface! The liquid could pocket billiards somewhere and movement a short.
Now open your PC and scrutinise its guts. The dust filters happening my scandal-encrusted case did a nice farm out of keeping large dust tabu, but mickle of detritus had still slipped in and built up on the heatsinks and on all of the flavourless surfaces. To unqualified the inside of the system, I started by vacuuming up totally of the at large debris and ridding the flat surfaces of as such dust as I could.
You could do the synoptic, only atomic number 4 careful: When vacuuming inside a system, don't use a big, high-hopped-up vacuum and by all odds don't drag the hose surgery nose on the surface of whatsoever circuit boards. The last thing you deficiency to do is knocking off a surface-mounted capacitance or resistance and draw it up into the vacuum. Use the vacuum sparingly, and center on gobbling high the largest bits of rubble inside the case and on fans, heatsinks, and the like.
Remove and reseat card game and cables
Erst you've vacuumed up most of the dust and dirt, remove the add-in cards from the system (along my test Personal computer, only a sound card and a video card fell into this category), and reseat all of the power and data cables on the drives.
Removing the cards makes them easier to clean. It likewise gives you a chance to counteract a phenomenon renowned as "silicon chip manner of walking" (or "micro chip crawling"), which causes cards and connectors to come loose all over sentence. As the components in a arrangement screw up, they expand slightly. And when they cool off, they contract. Over many cycles of expansion and compression, add-in card game and socket-mounted chips can creep out of their slots or sockets; reseating the cards and connectors ensures that they remain properly connected.
While the card game are out your PC, I recommend liberal everything a hearty attack of canned air. If you're cleaning a in particular dirty system, you may neediness to make out this part outside, because the dust will fly everyplace. Shoot the canned air at all surfaces and into all fans and heatsinks—in the direction opposite to the direction of the fan's airflow, if possible. If, afterwards vacuuming and victimisation the canned air, you still see dust on a surface (this is common inside thin heatsinks), use the brush to clean out and dislodge the dust, and then fire forth at the surface with the canned transmit again.
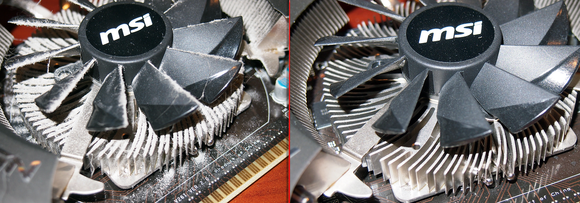
The vacuuming, brushwork, and multiple shots of canned air should remove most of the debris and other debris in your PC. Use a microfiber cloth to wipe outside any particularly stubborn dust. Never use paper towels to wipe anything down inside a system, because they be given to leave lots of small fibers and disperse on coarse-textured surfaces. A microfiber cloth leaves nothing behind.
One last tip: If your PC is much six months old, information technology's worth reapplying the thermal paste. The thermal interface material (or TIM) used betwixt CPUs and GPUs and their heatsinks breaks down over time and becomes less effective at conducting heat away from your PC's components. To replace the TIM, cautiously remove the heatsink and clean any old TIM from the heatsink's base and from the grade-constructed of the chip it was affixed to using isopropyl alcohol (or any opposite alcohol-based dry cleaner that won't leave any rest). Once the surfaces are pure, give the new TIM and remount the heatsink. For detailed instructions on how to apply thermal port material and how to put in heastinks on both AMD and Intel processors, chit impermissible our guide to installation a CPU cooler.
Diarrhetic cleaning pays off
Cleaning all of the muck and dirt out of a system bum be pretty staring, at to the lowest degree the initial time around, but doing IT regularly ensures optimal cooling performance and stability. At that place's really no downside other than the fourth dimension spent, which won't equal fun if you've neglected your rig for an extended period. So get in thither and get your hands dirty—your PC deserves a little TLC.
Source: https://www.pcworld.com/article/451642/youre-a-dirty-dirty-dusty-pc.html
Posted by: vanalstynerefustoo.blogspot.com
0 Response to "You’re a dirty, dirty, dusty PC - vanalstynerefustoo"
Post a Comment