

Turn Photo Into Line Drawing Illustrator
Being a photographer has its perks. You always have amazing photos that you can gift to your family and friends, and create photo albums and printed coffee mugs too.
But sometimes you need to add a special touch!
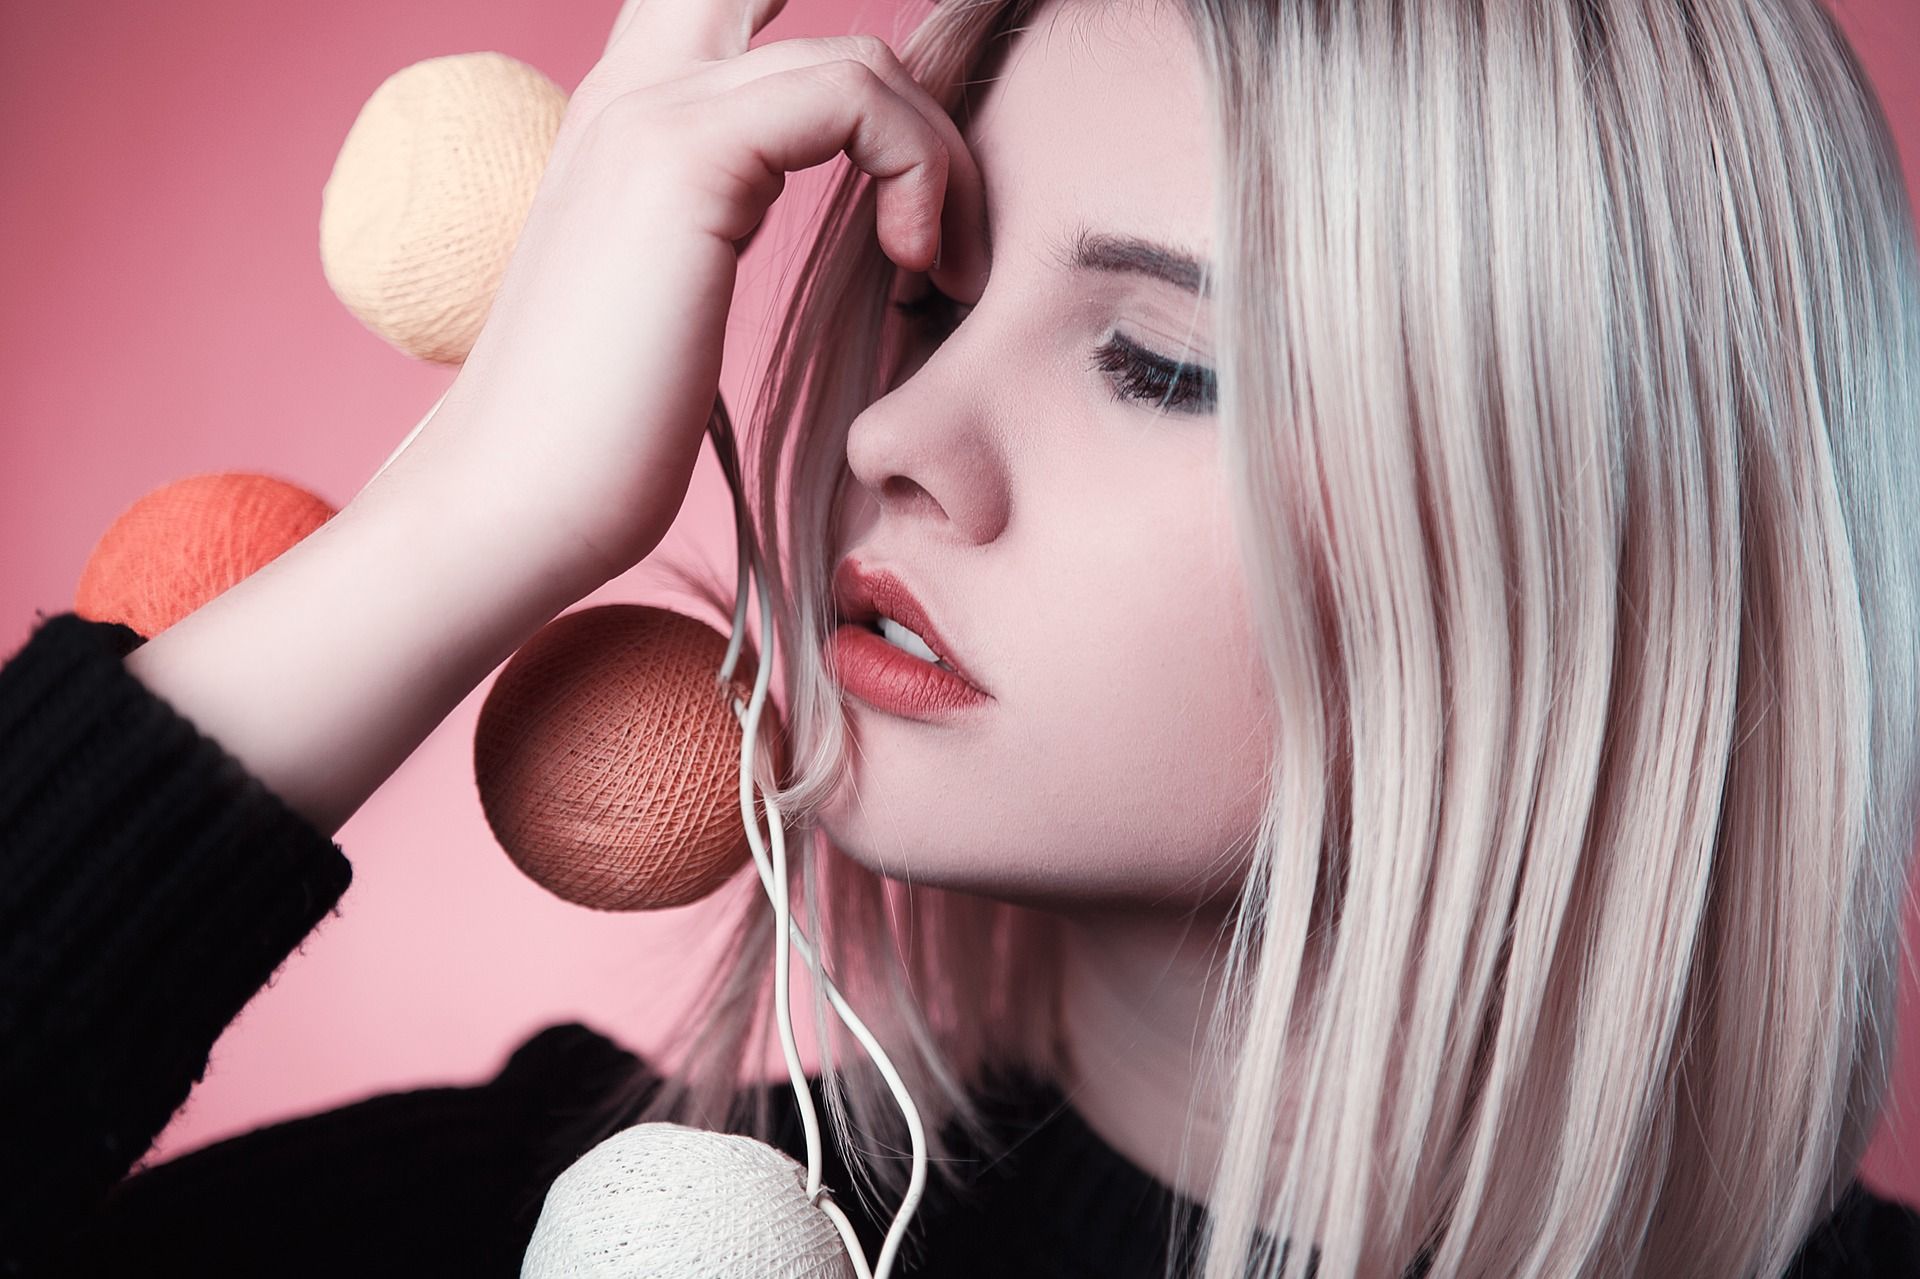
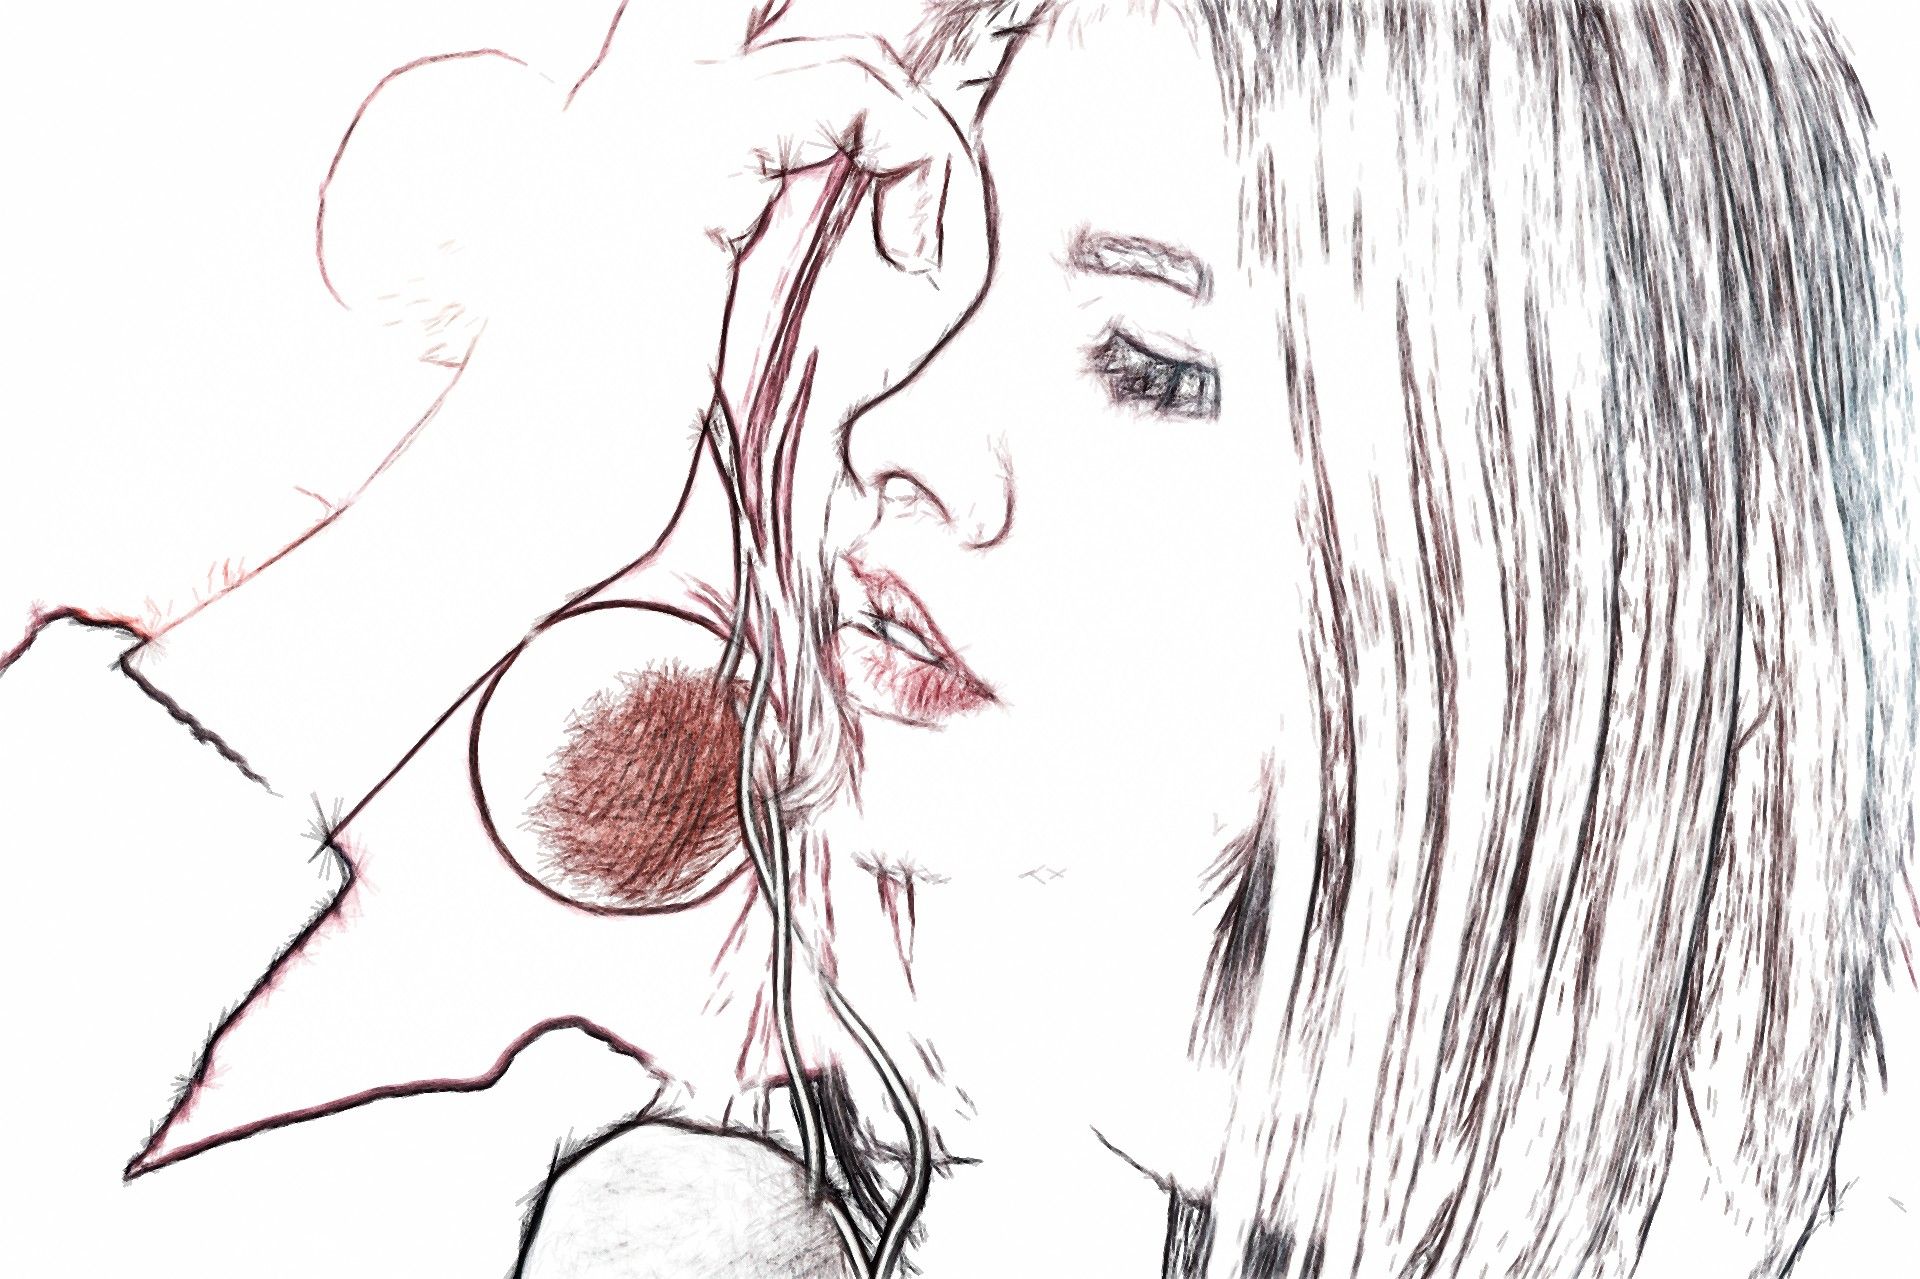
By learning how to create line art and drawings from photos, you can change a normal portrait into a beautiful pencil sketch.
Knowing how to use photo to drawing software is the key, and we will talk about such programs and the steps you need to know. We'll also discuss a few examples and smartphone apps that can turn any image into a drawing.
Let's dig in!
How can you turn photos into line drawings?
With the help of modern technology and a few techniques, you will see that many free online programs allow you to create a realistic sketch within a few minutes! No need to worry about hours of practice, torn pages and spending money on professionals.
Why to create line art from photos?
This is a simple question to answer.
Photos say a thousand words, no doubt. But there are so many photos out there that you need something to make yours stand out. By converting a photo into a sketch, you can add that pinch of magic which turns a good photo into an amazing piece of art.
There are a few other uses of line art too. You can use it as a gift, or for practising your own hand drawing skills, or to create an art diary, photo frame, t-shirts or even for illustrating a book.

And the best thing is, changing photos to line art is simpler than you would think, and you get many options to choose from.
Best software to turn photos into line drawings
Sketch Drawer software
SoftOrbits Sketch Drawer program is a one-stop solution to convert images into line art.
With loads of conversion styles, presets and effects available, the Sketch Drawer software will turn any photo into realistic drawings – that too with colour shading if you want!
The program is intuitive and automatically detects light, shadows, colours and outlines, so you don't need to worry about making any selections or adjustments.
In only a few clicks, you will have an accurate drawing ready for use!
Along with photo to drawing conversion, the Sketch Drawer also has options for turning an image into a stencil or an anime drawing.
Let us have a look at how you can use the Sketch Drawer program for creating line art from photos.
Step by step tutorial
There are various options to get the desired look you want, but the steps to be followed are largely similar.
So, we'll be covering the list of things you need to do for using the Sketch Drawer software, and also the different styles and presets inside it. Don't worry, we'll learn more details about the conversion styles in the next section, with examples!
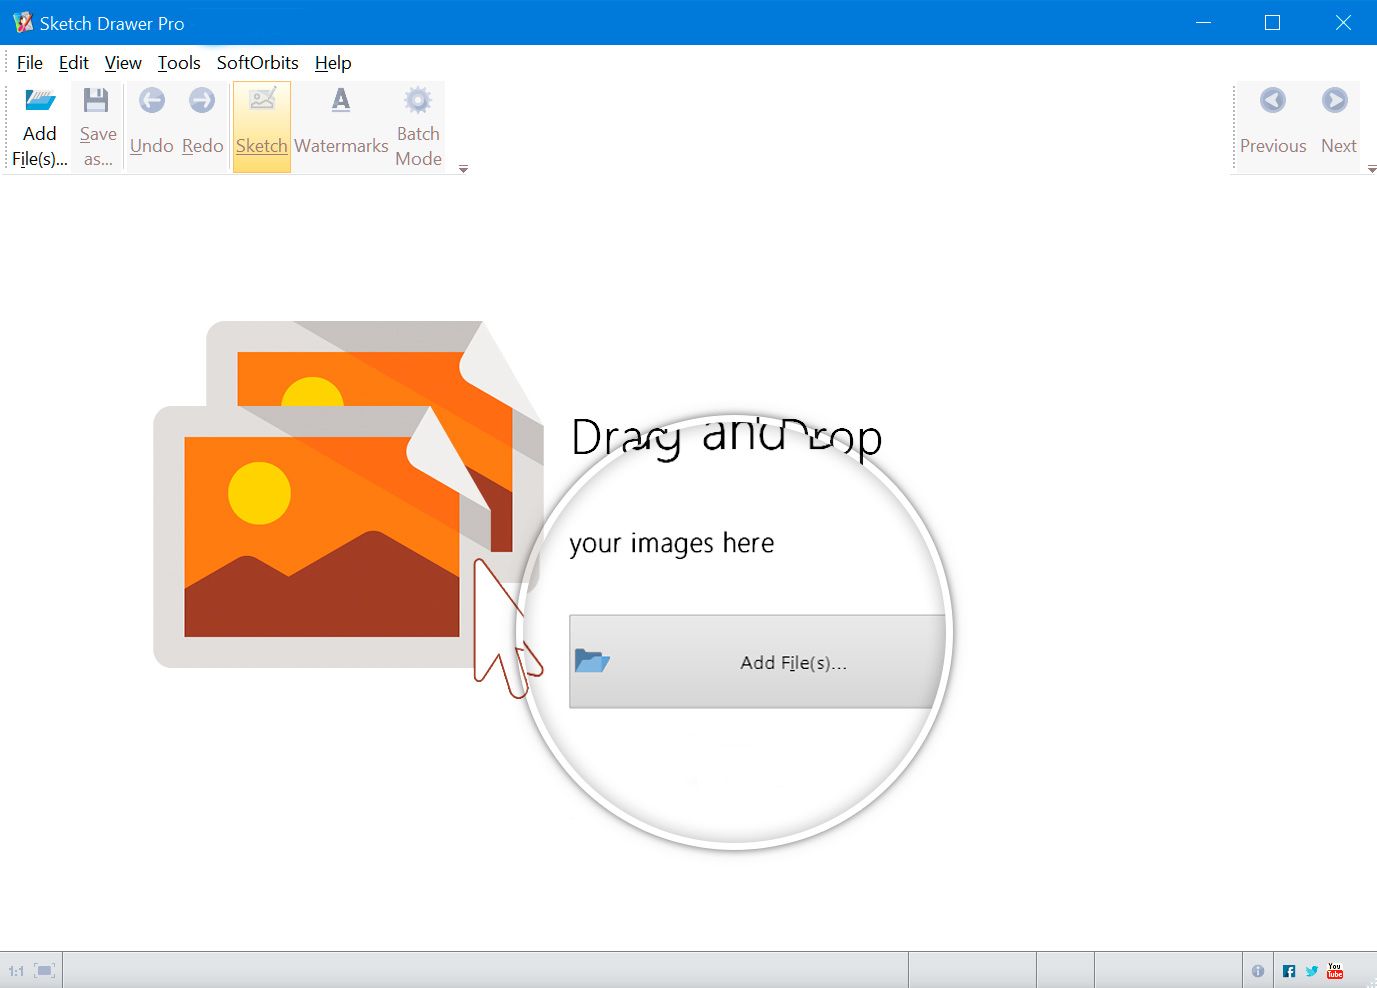
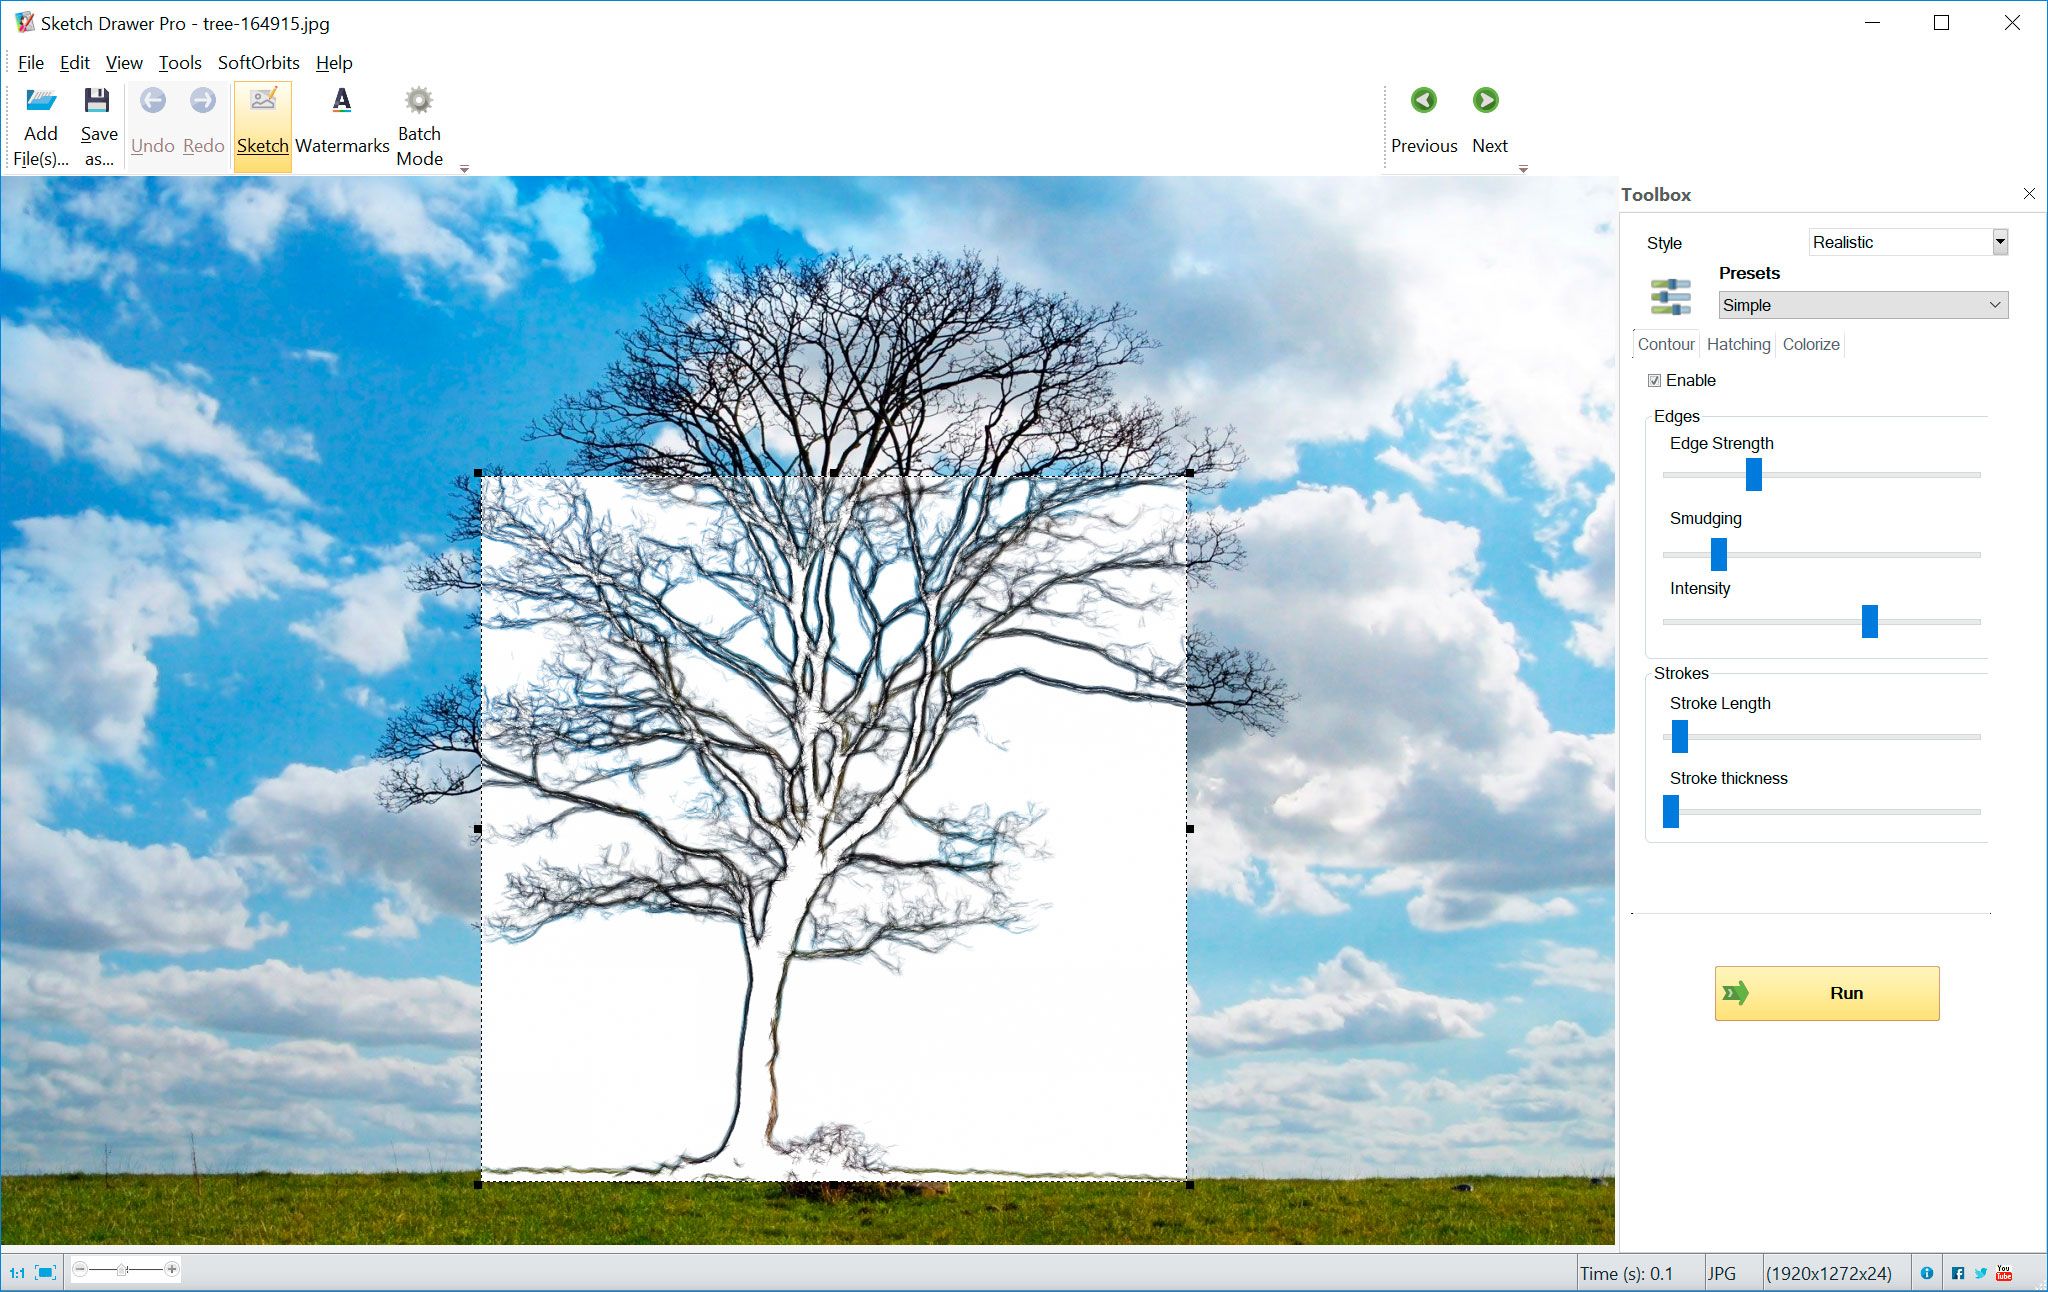
Add File
On opening the program, you will see an option Add File . Use this to upload your photo, either by browsing through your files or simply dragging and dropping.
Sketch Style
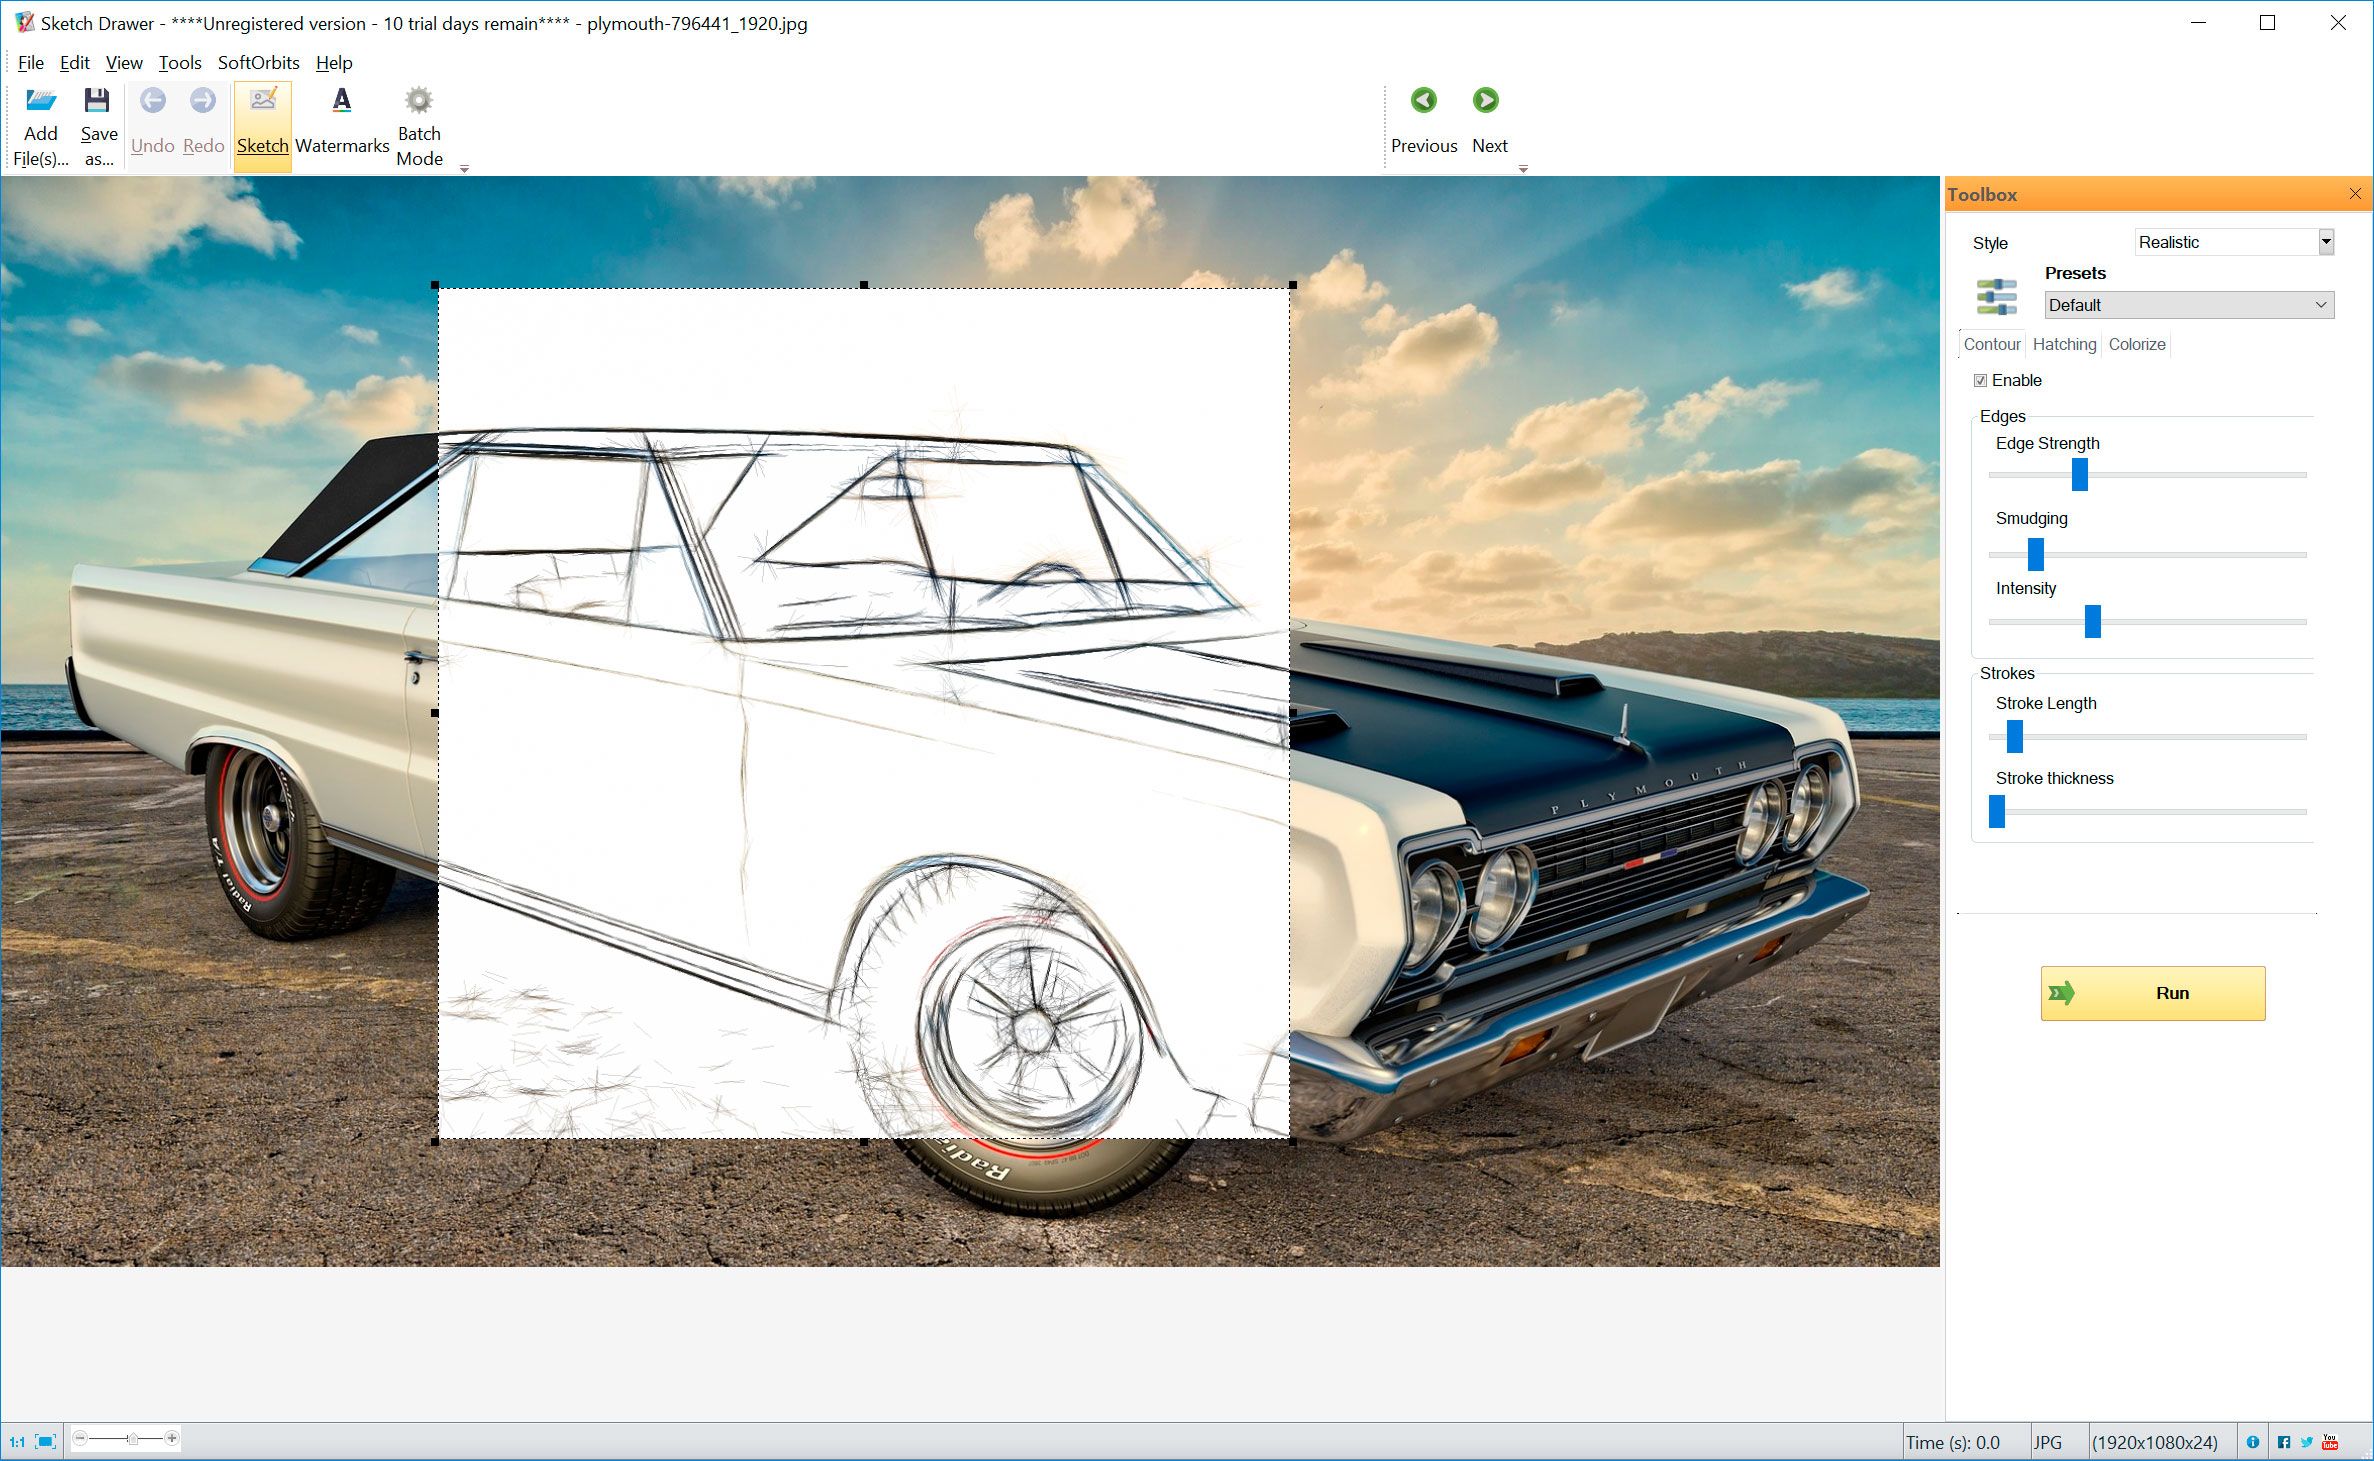
Sketch Drawer has a toolbox on the top right side, where you can select one of the three options under Style - Realistic, Classic or Detailed Sketch.
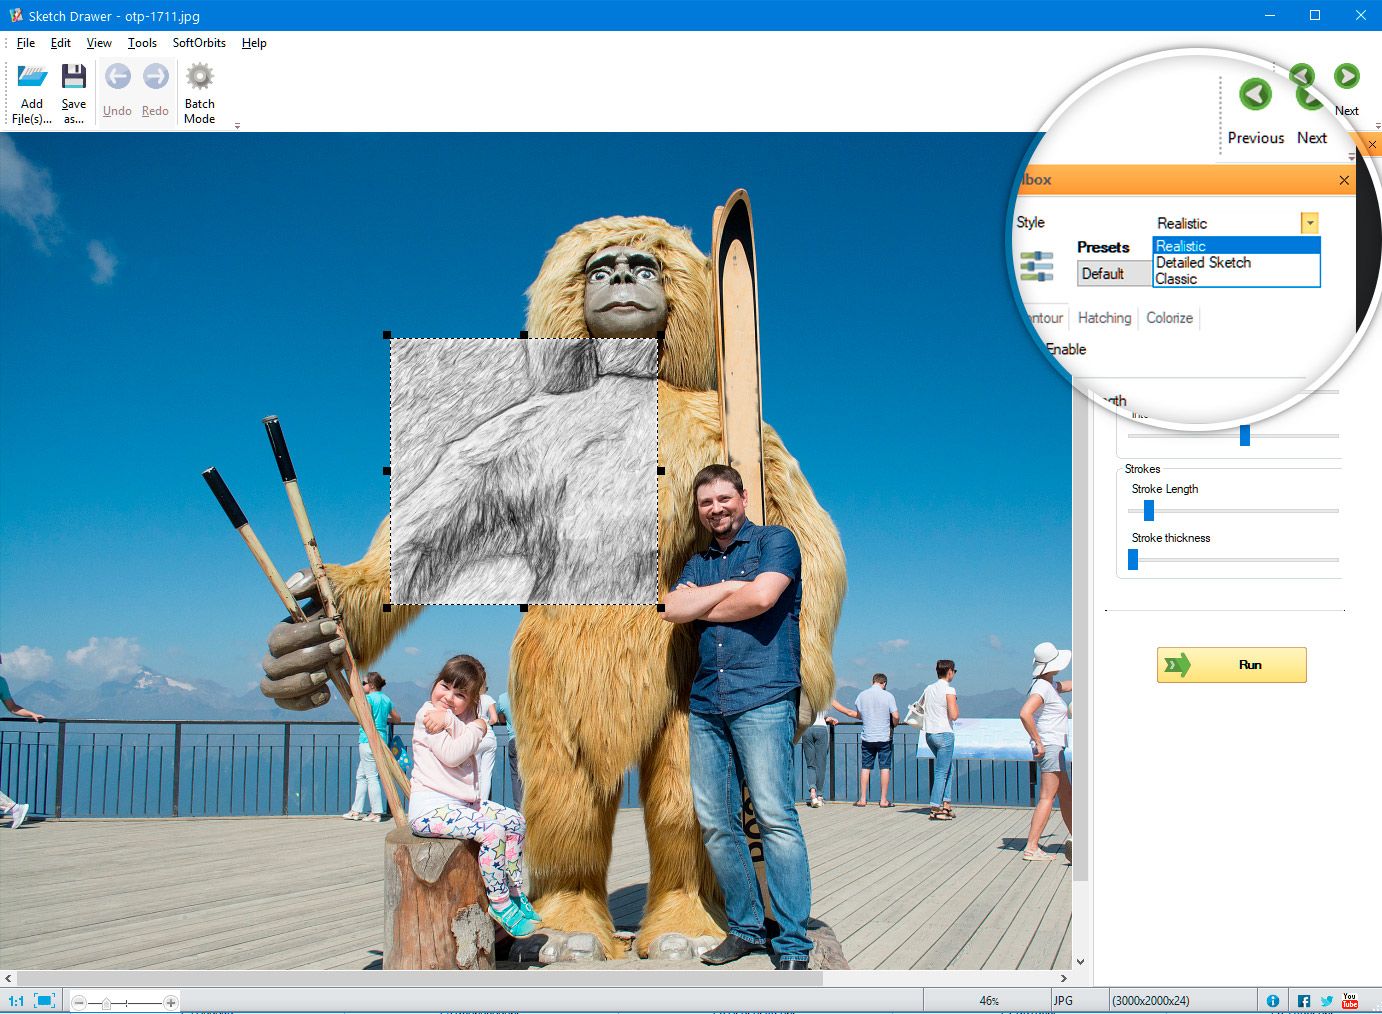
Each of the three styles has its own distinct look, and you should try them all out to see which one works best. To make things easier, Sketch Drawer shows a preview of what your final image will look like, so you can try every option in a second and get a sample of the final result!
Realistic style works well for capturing the overall details and adding pencil shading to the final result. It works well for close-up portrait shots and still life images.
Detailed Sketch, on the other hand, works well when you want to emphasize a lot of detail and create a carbon copy of the image. While good for landscape images, it might not be suitable for portrait shots, which look better when subtle.
The Classic option gives a very minimalist appearance, with soft pencil strokes and less shading. You should use this if you want a simple natural-looking result, and not something that was created by a perfect computer!
Select Preset
The style decides the overall look of the converted image – whether it will be detailed or realistic or classic minimal.
The Preset on the other hand decides the appearance itself – whether there will be any colour, the amount of shading involved, whether the look will be like water colours or pencil drawing etc. And there are loads of options to choose from!
The Preset option can be found on the right side, below the Style option. Sketch Drawer gives multiple presets like Felt tip pen, colour drawing, pop art, low contrast sketch, high contrast sketch etc. You will get a preview of each one as you hover with your mouse pointer over it and move around the list!
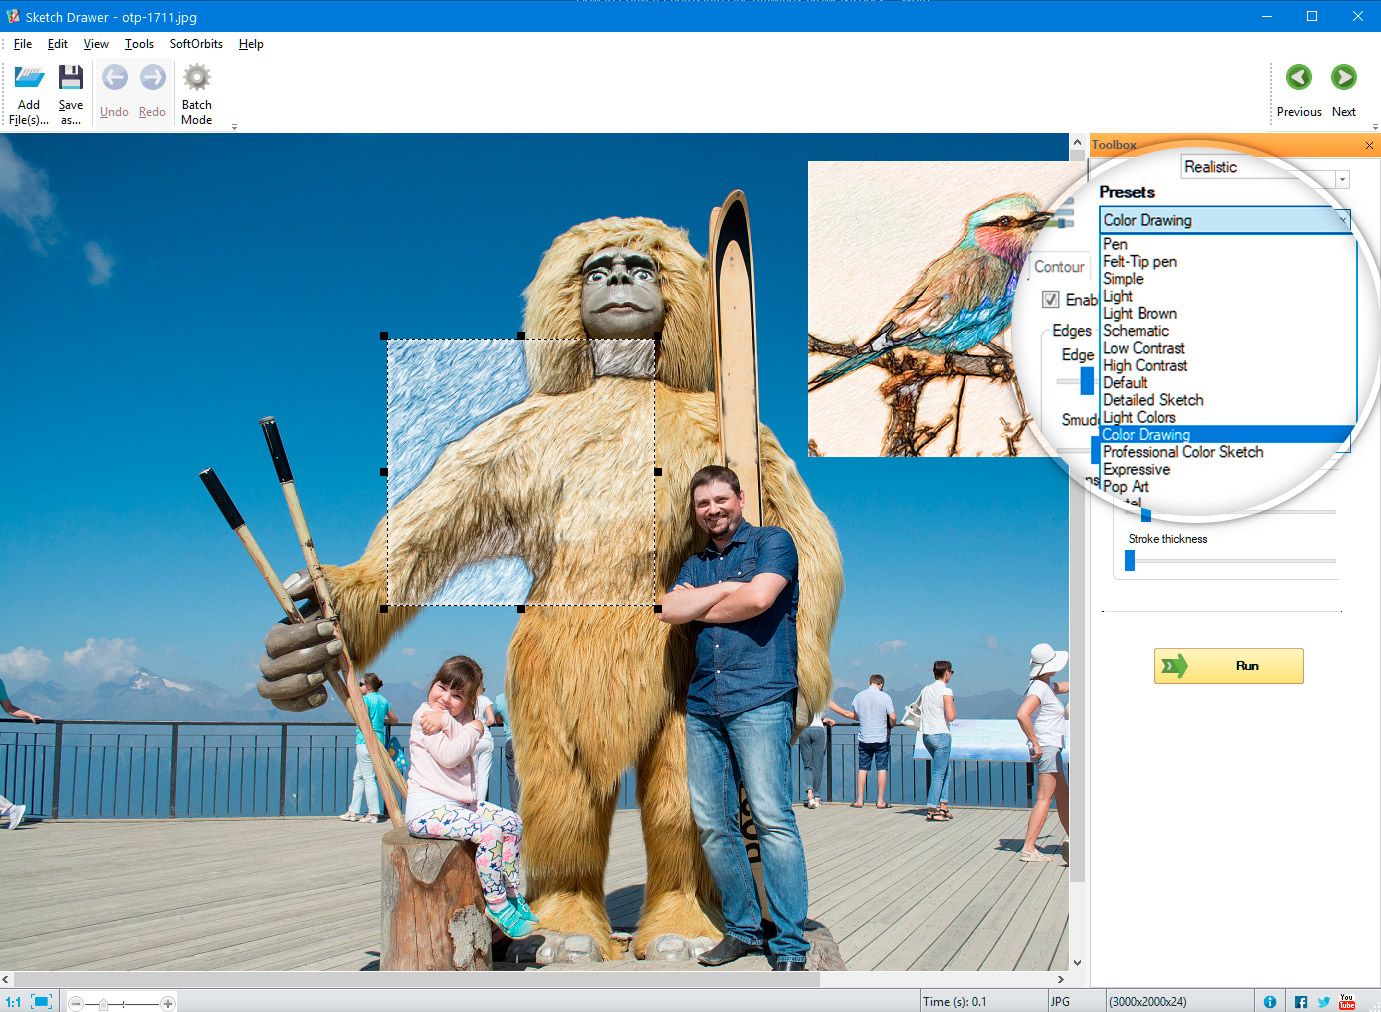
We'll discuss more about the various presets and what they do once we go through all the steps.
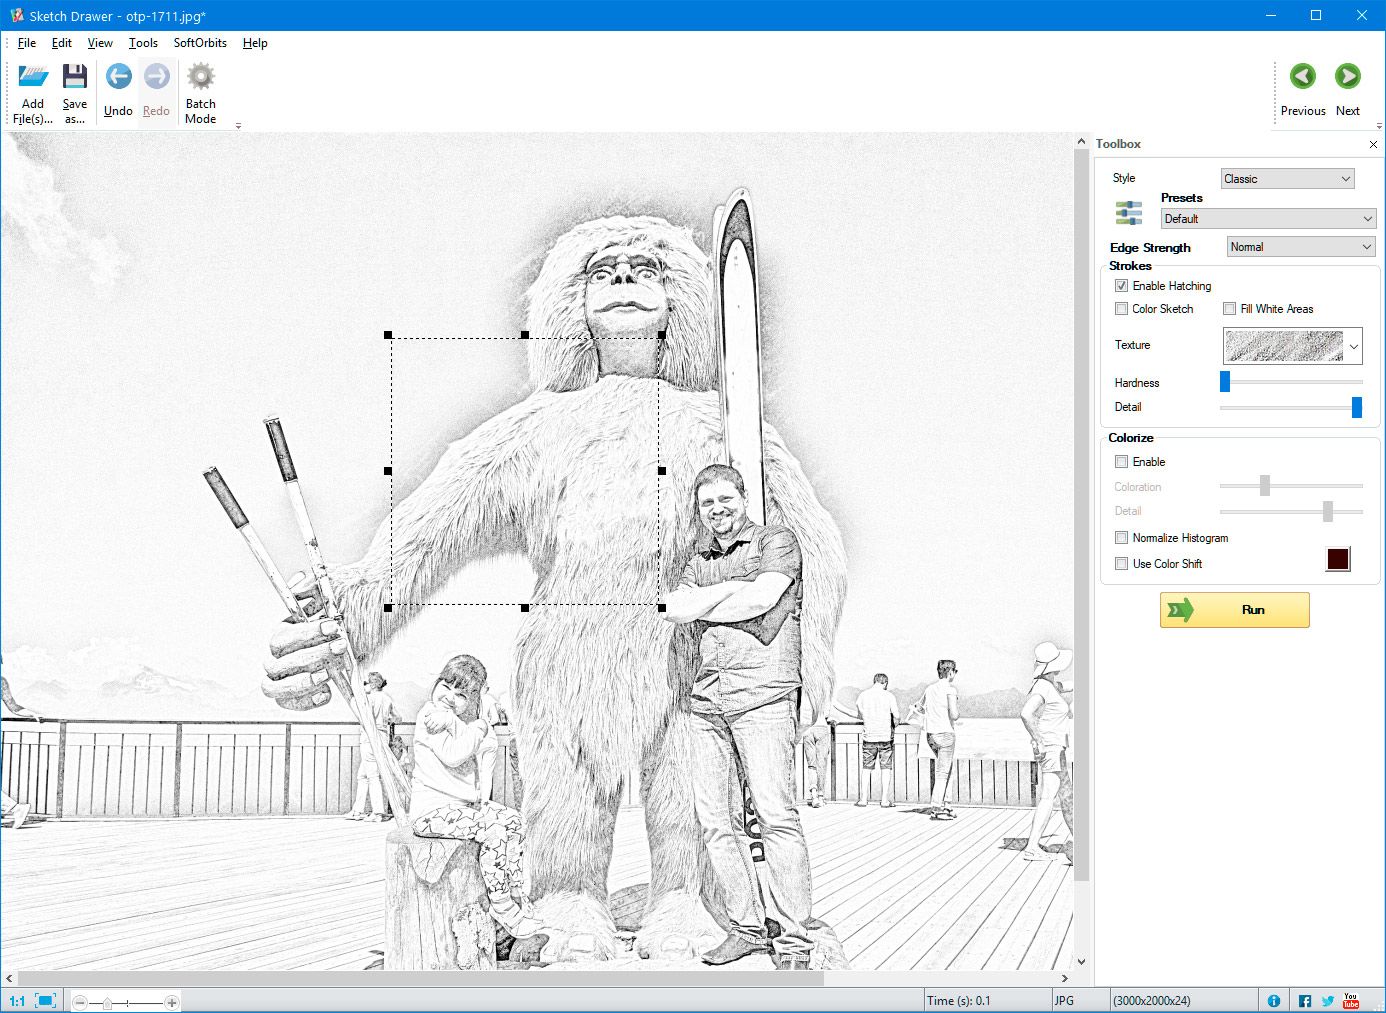
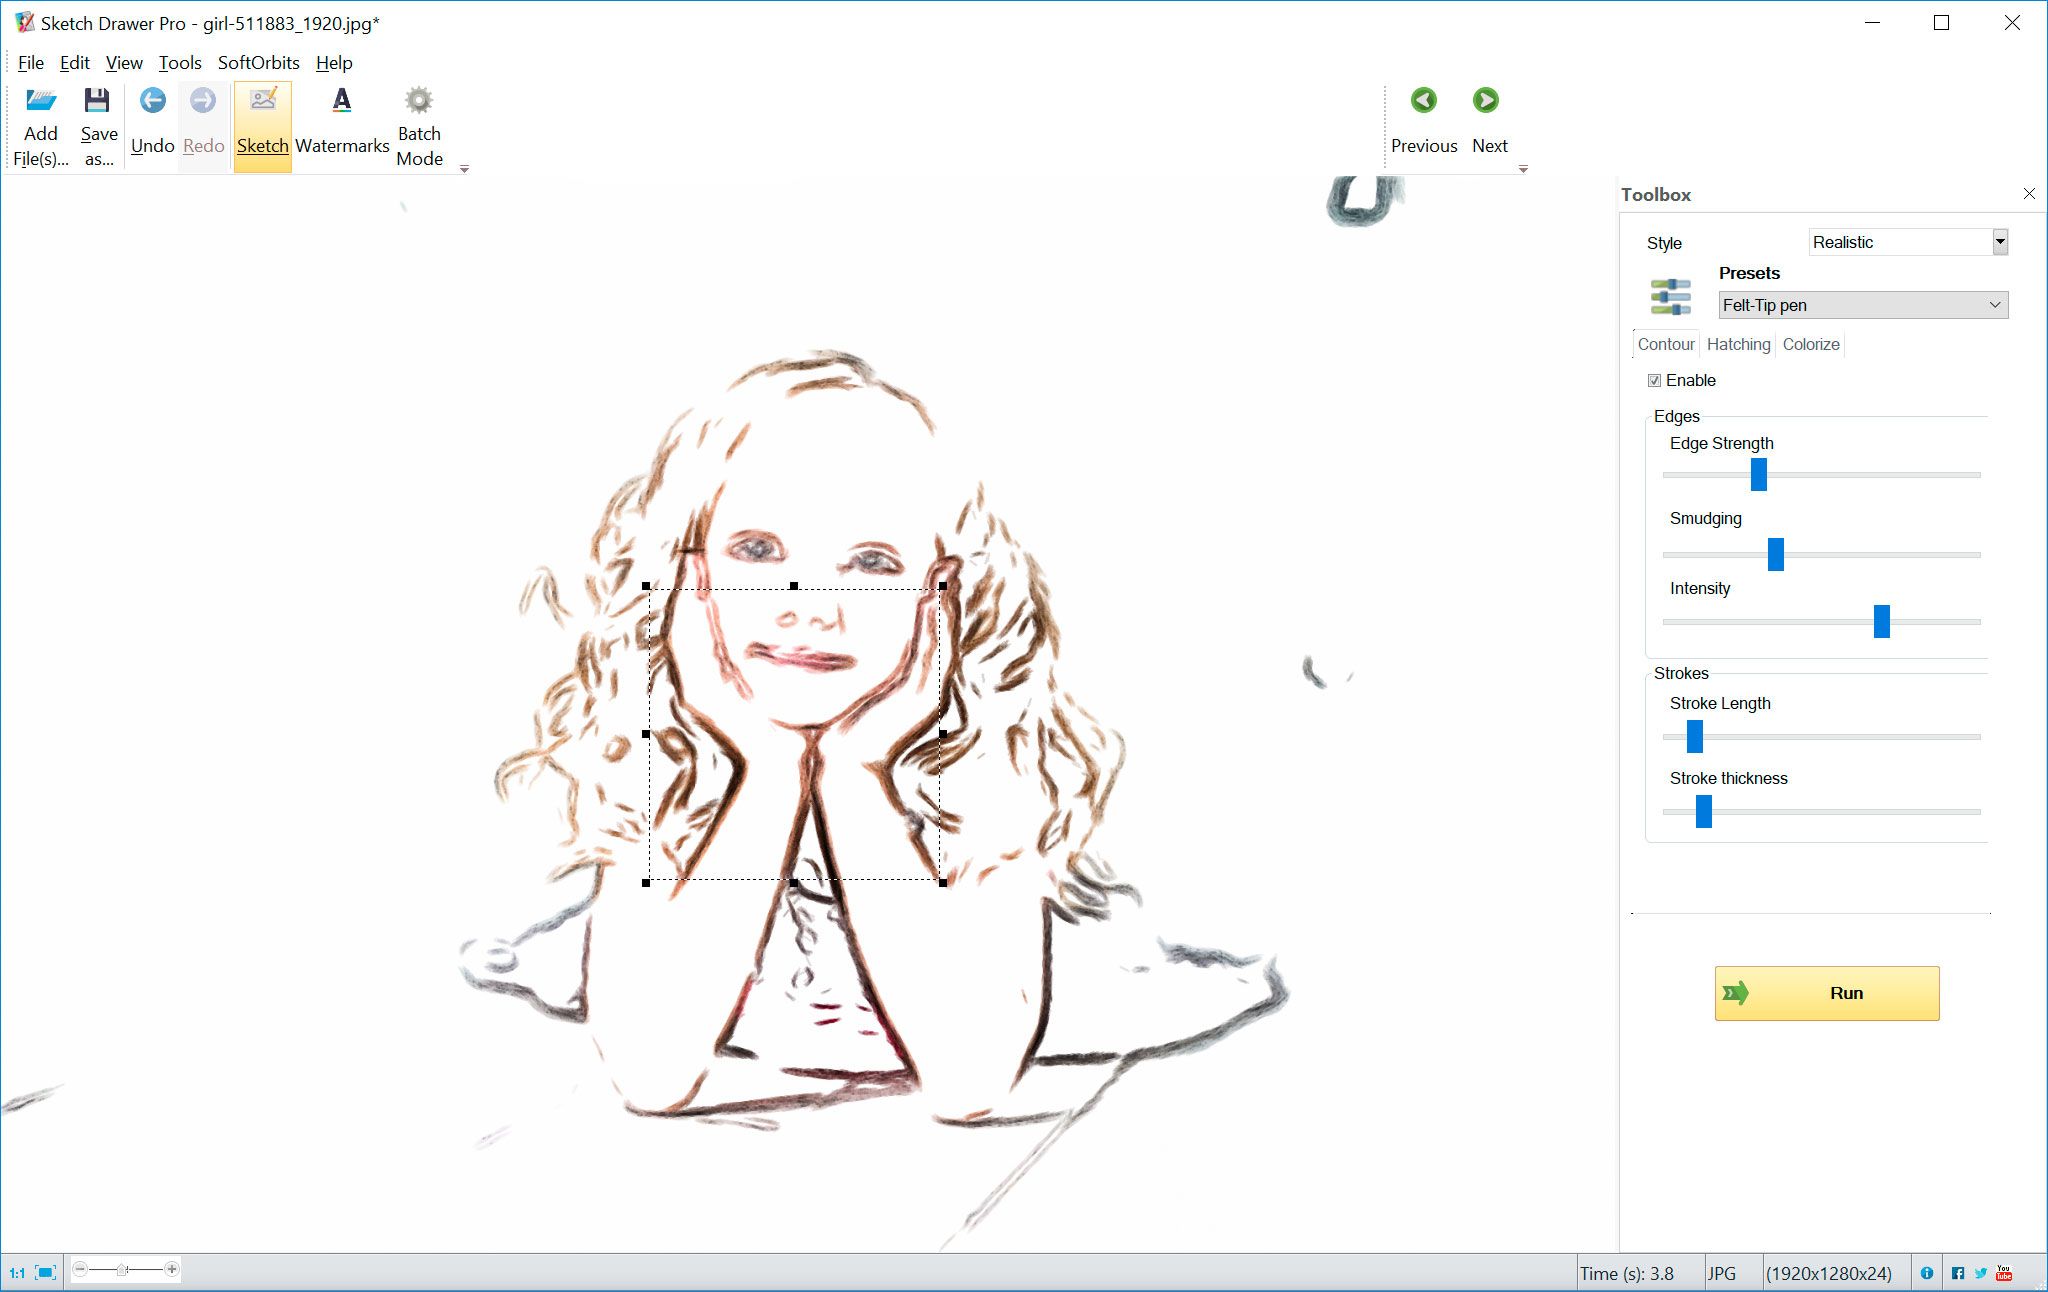
Adjust Sketch settings
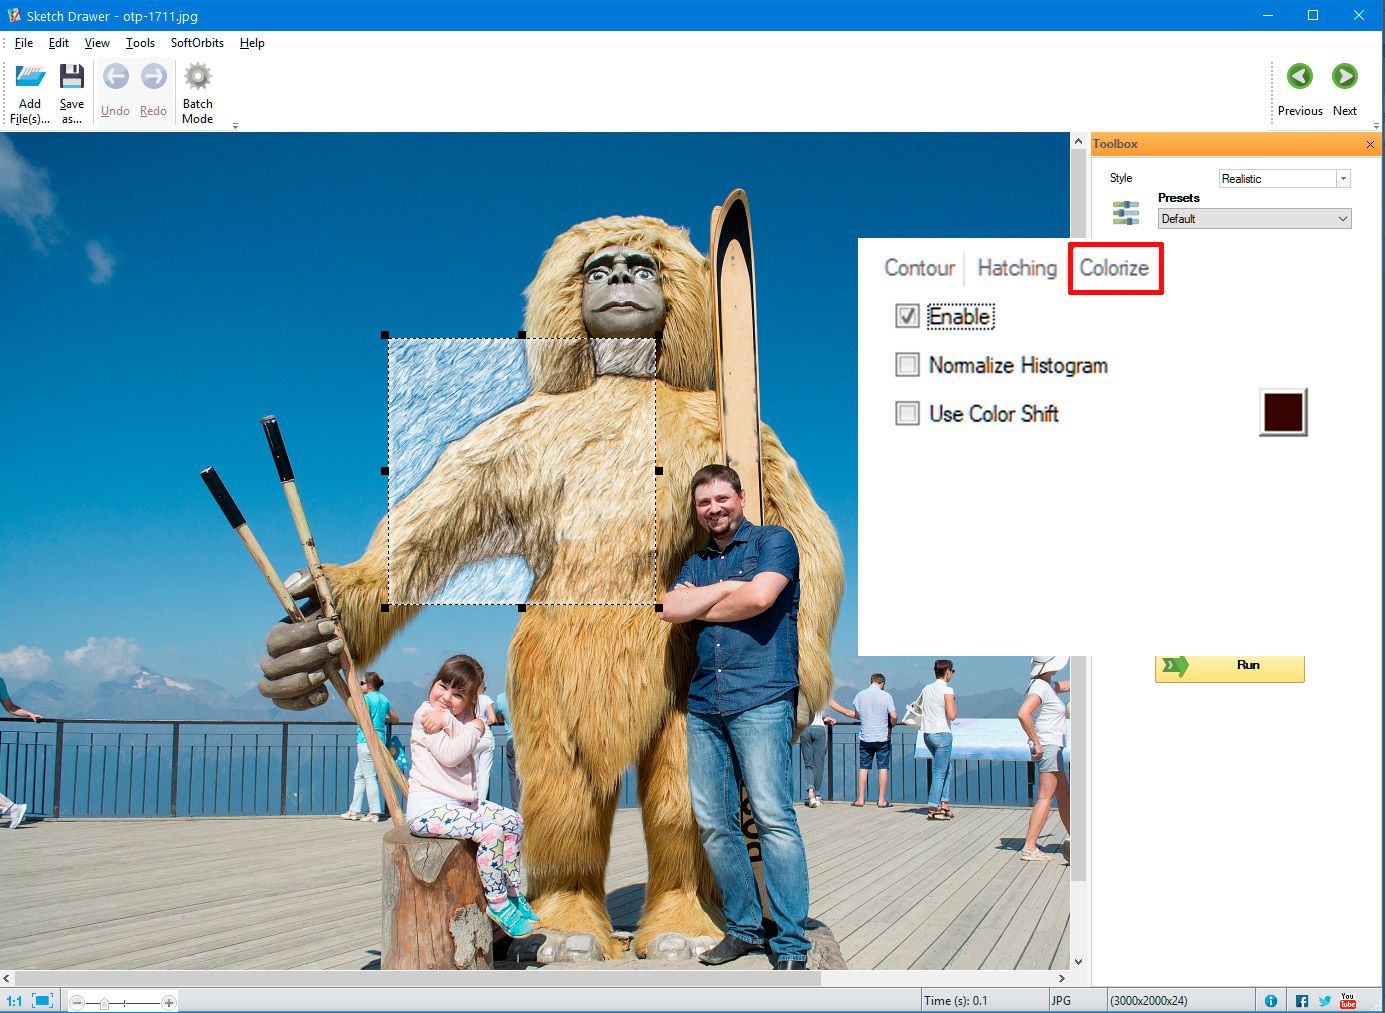
You are half done! After selecting the overall style and the preset to be applied, you can fine tune all the settings using three options – Contour, Hatching and Colourization.
There's a box below the Preset option which allows you to enable the above three options.
Let's take a look at what they do!
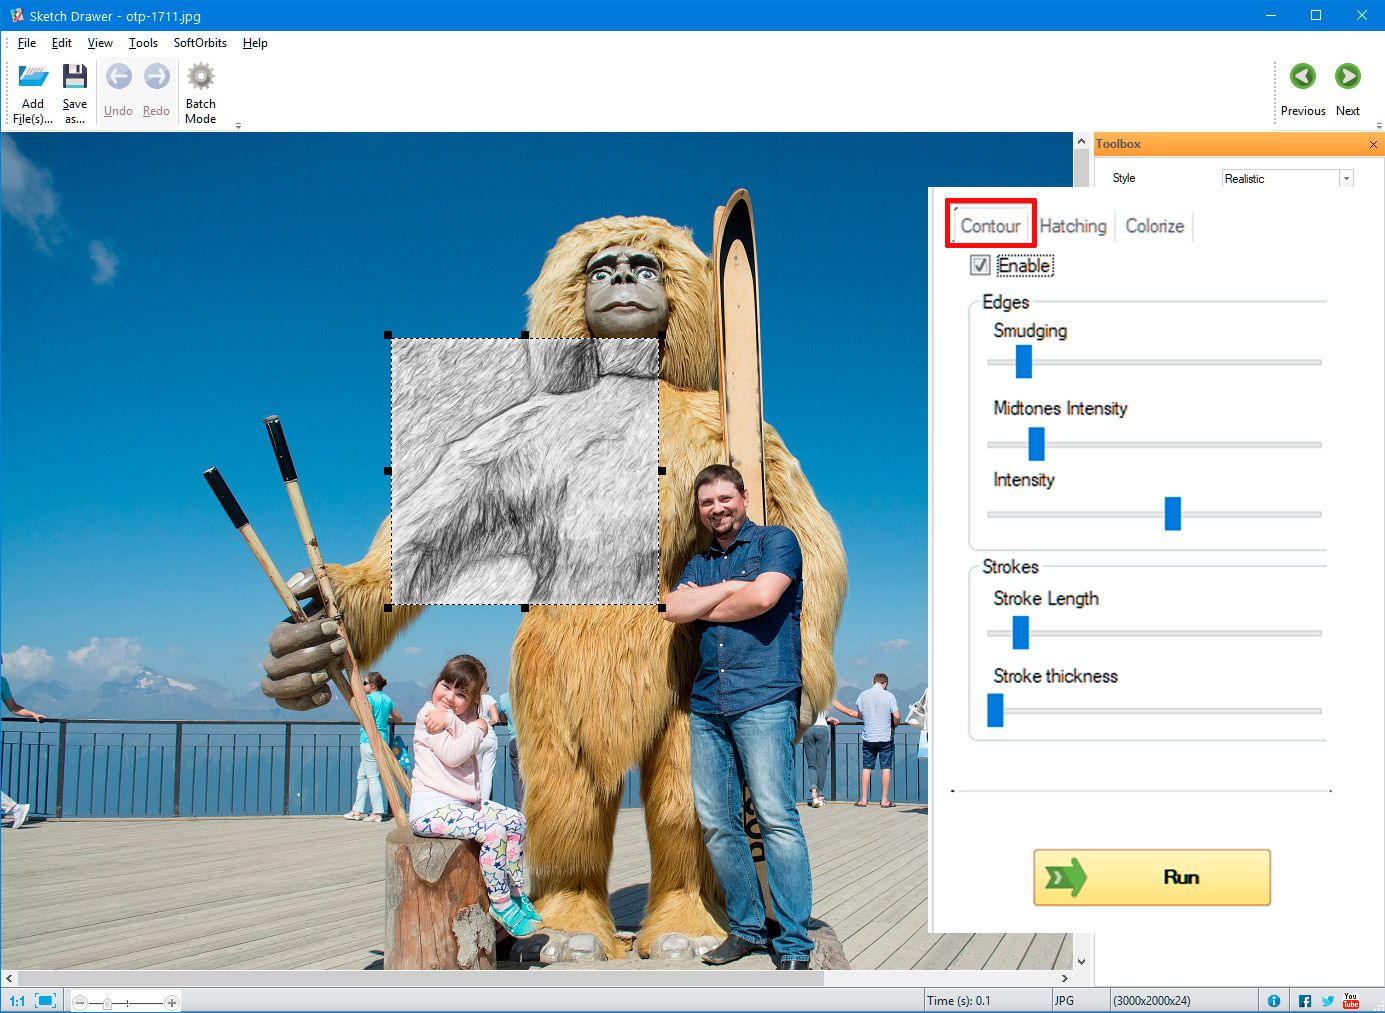
Contour Settings
On enabling the Contour settings, you can control edge strength, smudging and even the thickness and intensity of the pencil strokes used. By increasing the edge strength, Sketch Drawer will put more emphasis on the outlines of the photo, giving you the best line drawing possible.
You should try adjusting the stroke thickness too, so that you can get bold lines which highlight the outlines of your subject.
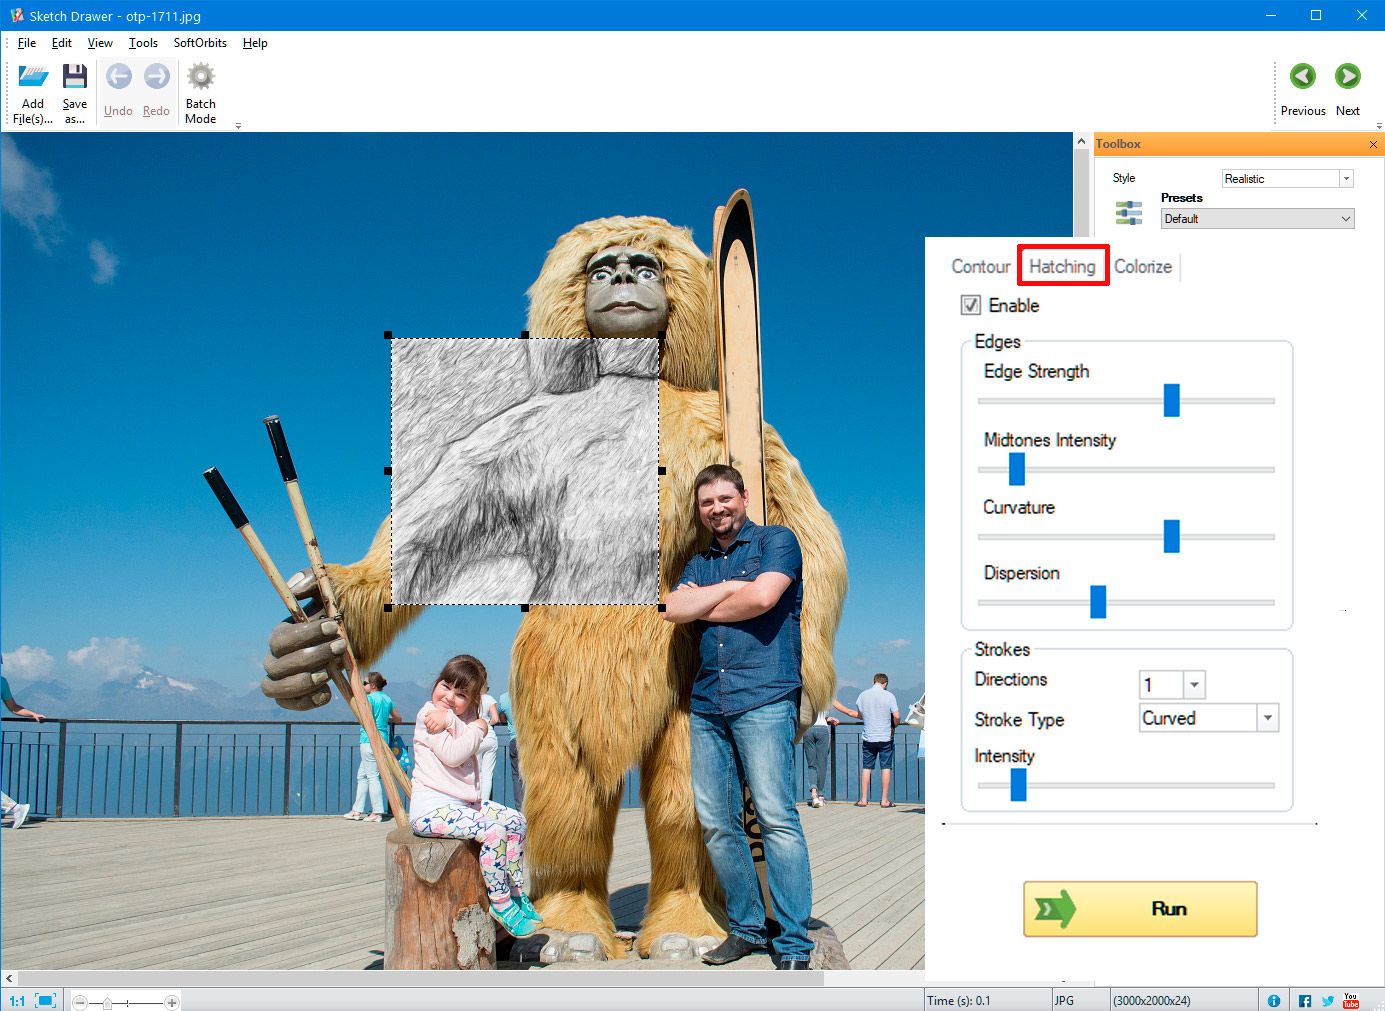
Hatching Settings
Hatching is actually the zig-zag, crossed lines which fill the white space in the sketch. It creates a pencil shading effect, with dark areas having more hatching to create shadows.
You can adjust the look of hatching as per your liking! By increasing the edge strength, you will again emphasize shading at the borders, leaving more empty space in your photo.
You also get the option of adjusting midtone intensity here, which will decide whether areas with moderate light – not too dark, nor too bright – are also given the shading effect or not.
Colourization settings
This is probably the most fun option to use!
On enabling the colourization setting, you can decide whether you want the line drawing to be a black and white sketch, or have some colour. Sketch Drawer even lets you decide which colour is used for converting the image into a sketch!
Save image
Click on the Run option at the bottom right side to convert the full image into a sketch.
Once you are satisfied with the way the strokes and shading appear, you can click on Save File at the toolbar on top. Your drawing is ready in five simple steps!
Best Line Drawing Effect Presets to Use
Now that you know the steps you have to follow, we can discuss a few preset options quickly! These will help you get the best out of Sketch Drawer.
Schematic Drawing Preset
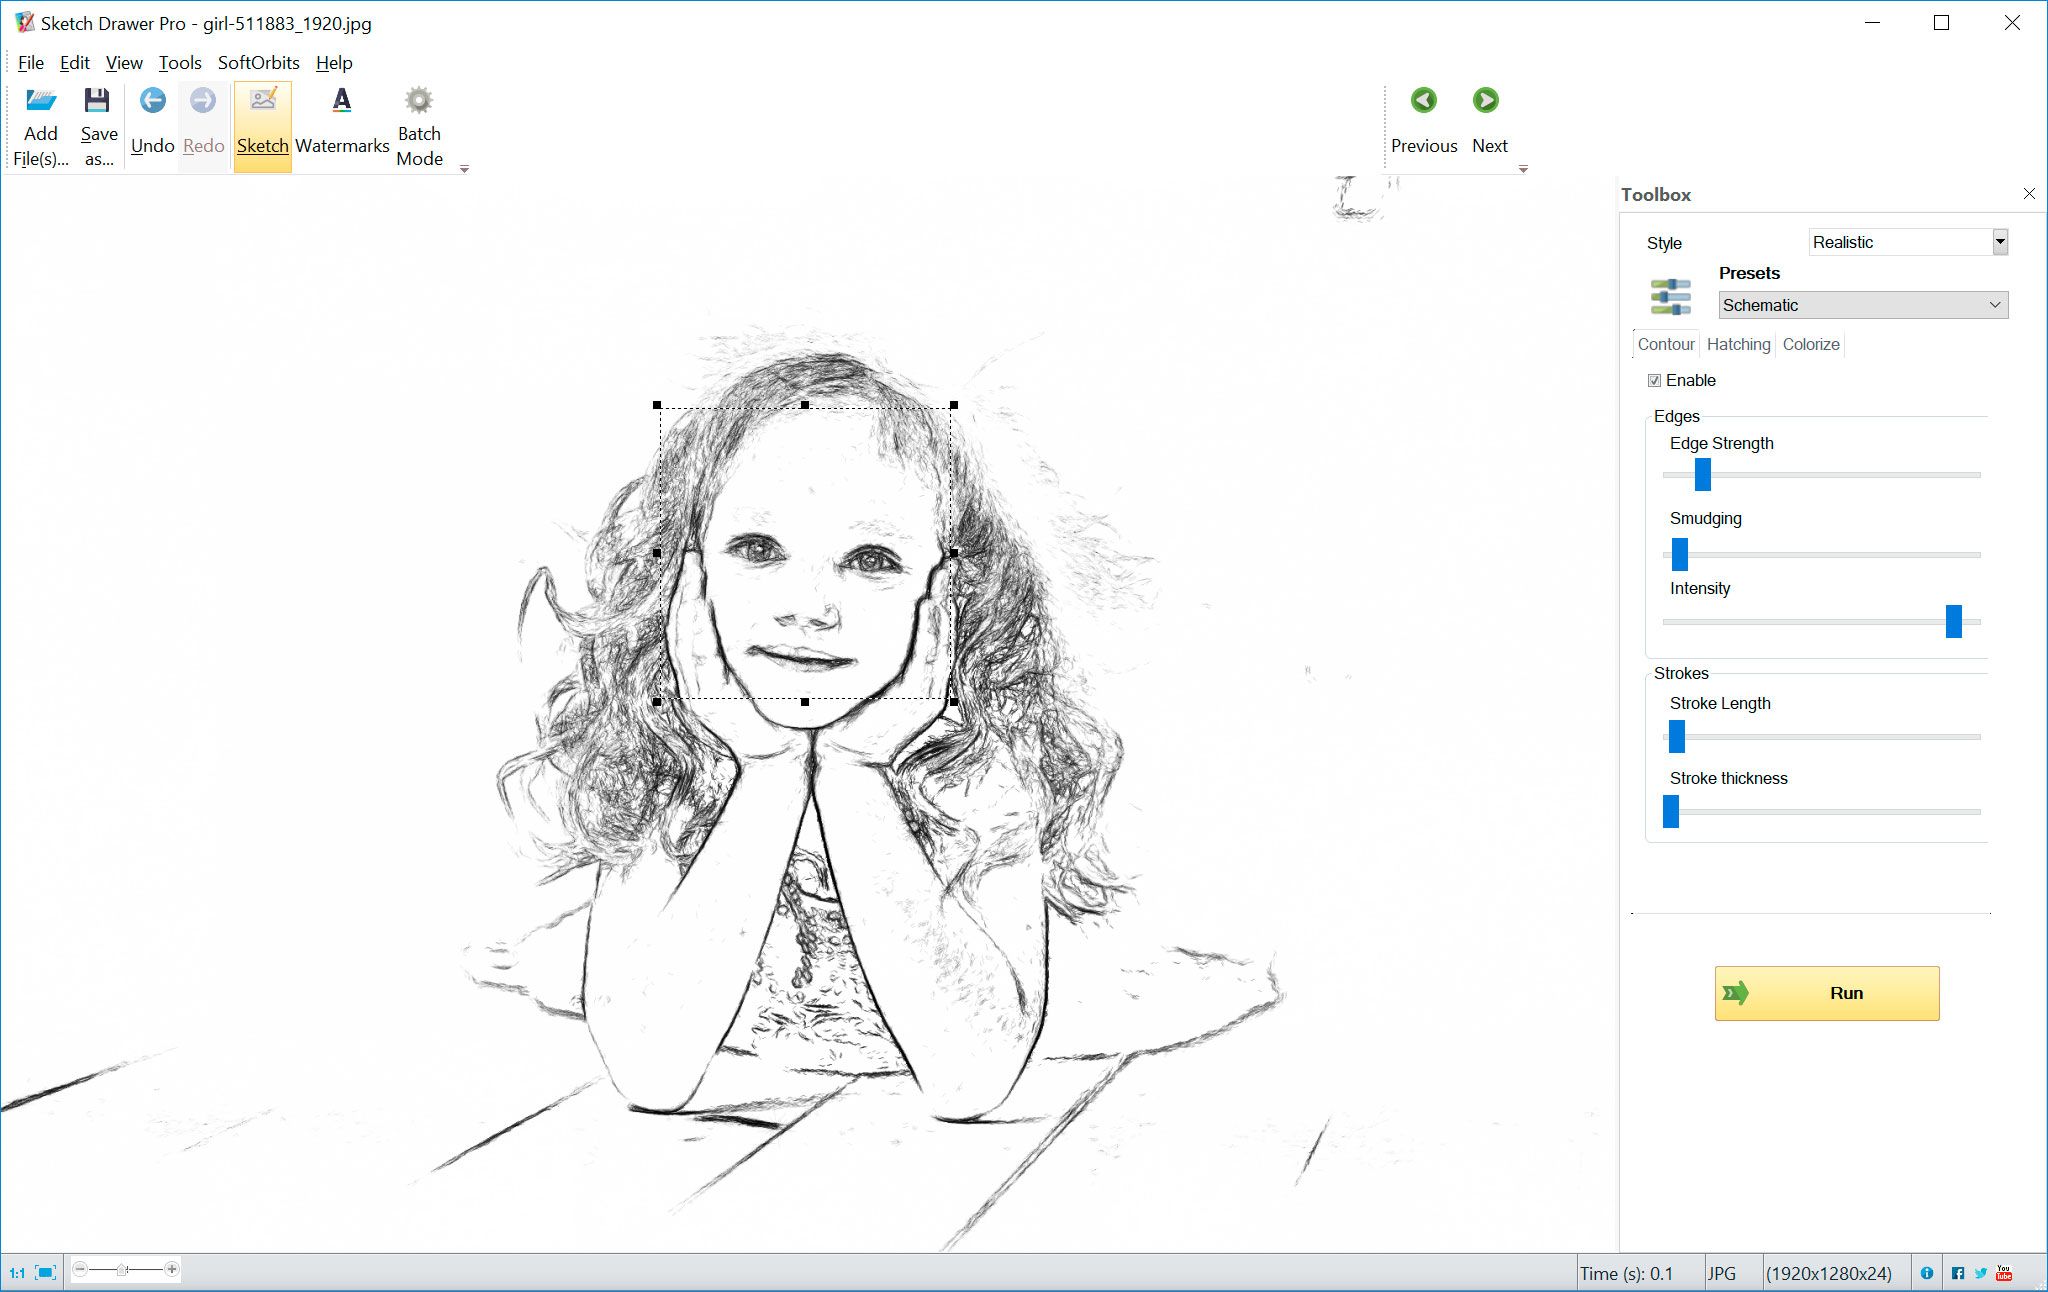
Like the name suggests, the schematic preset gives you a simple black and white look. It is perfect for creating a pencil drawing appearance, and works very well for portraits!
While you will see less hatching and shading in this, the schematic preset renders soft, natural borders. So, you can use this as a reference to practice your sketching skills or simply take a print for your scrapbook.
Simple Drawing Preset
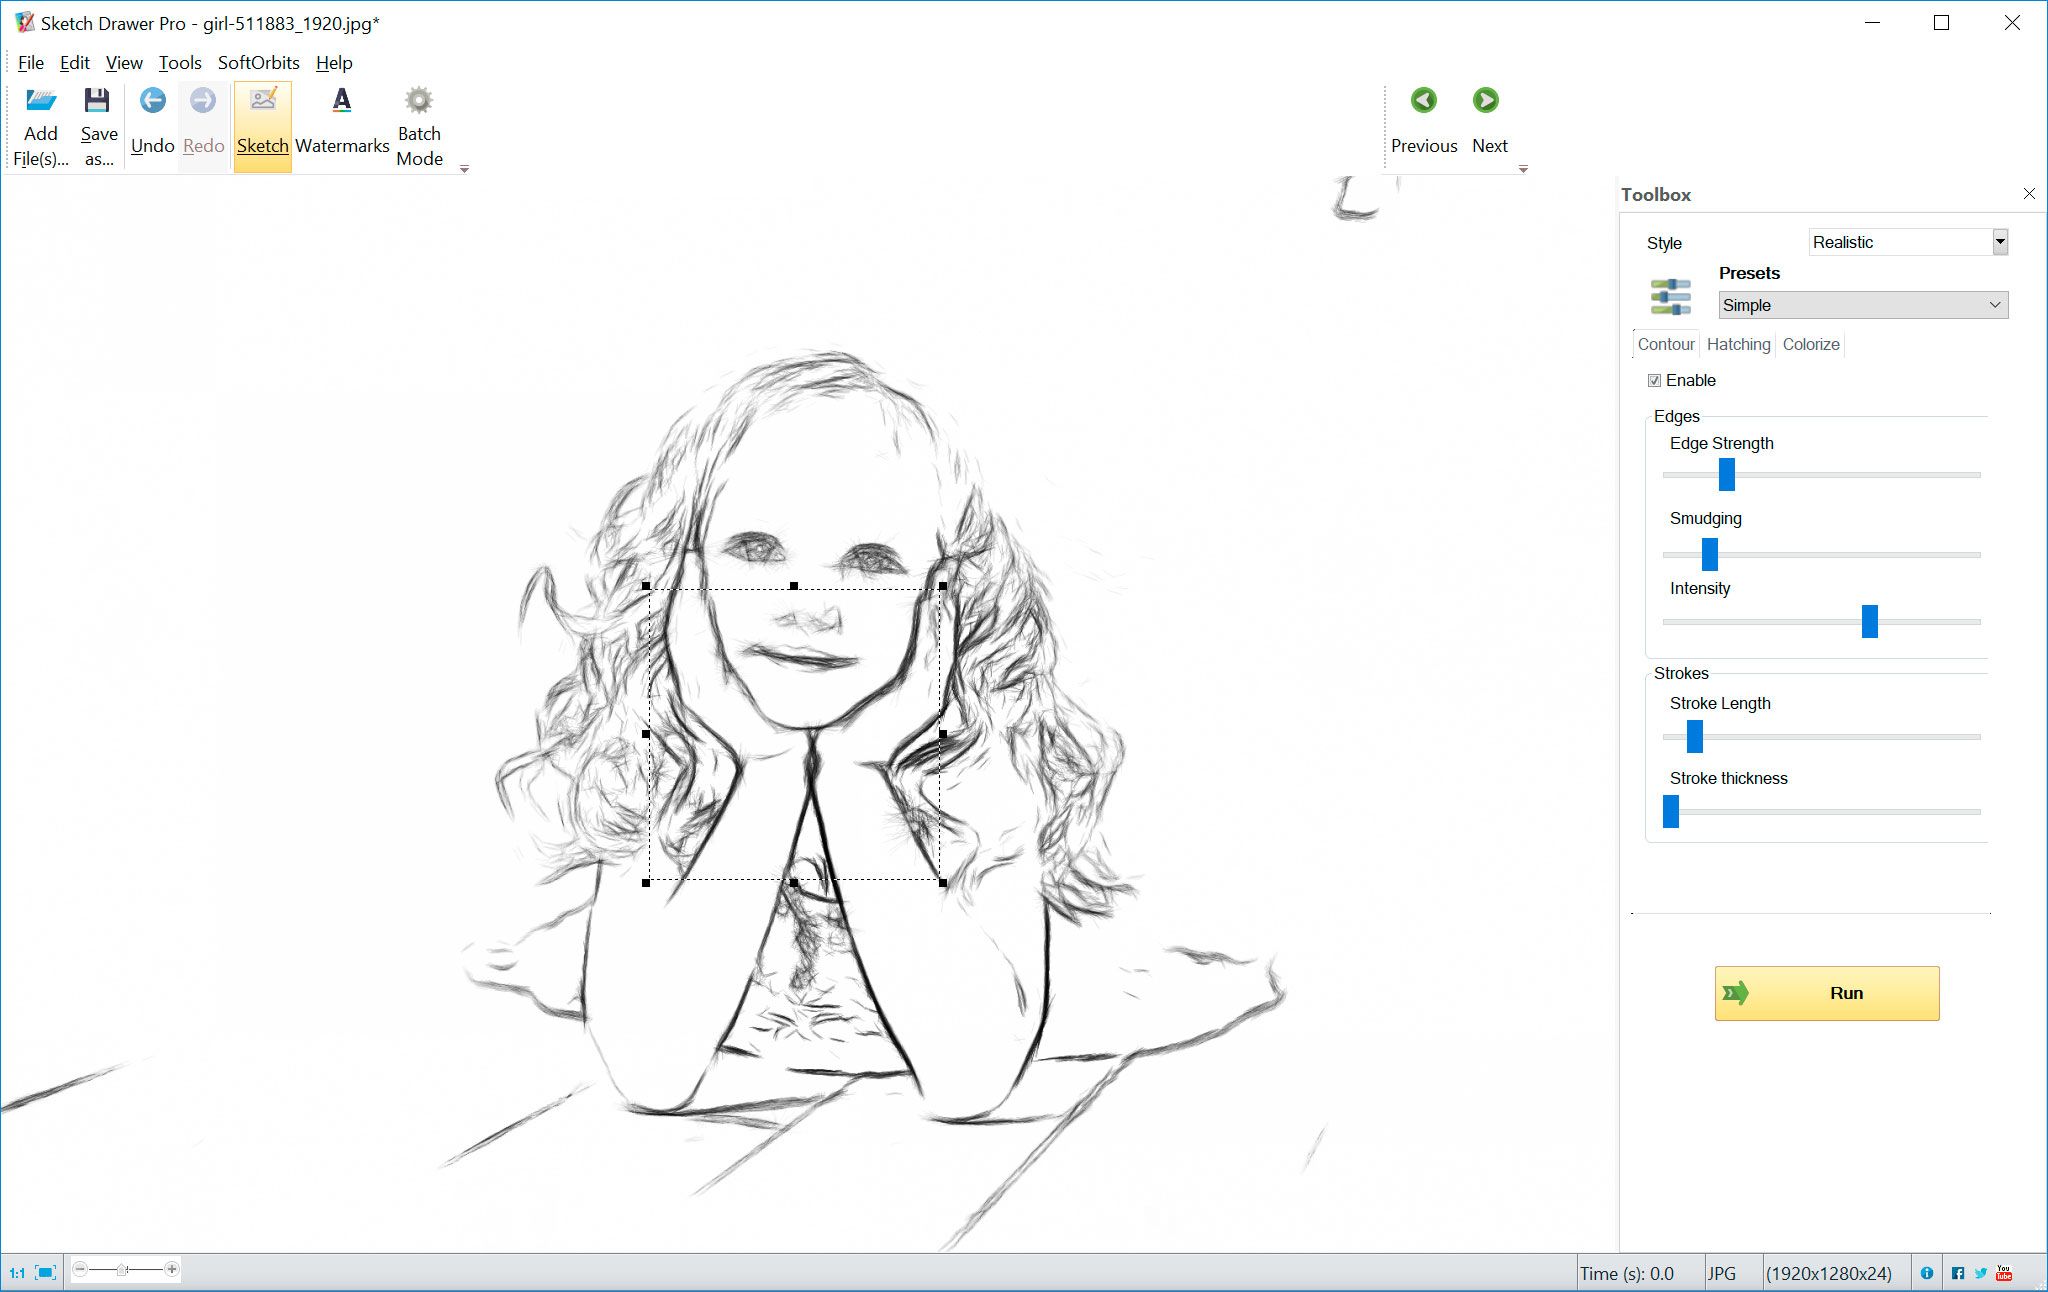
The simple preset also gives a black and white sketch, but unlike Light, the final result looks like a sketch made from a paintbrush rather than a pencil. This preset is great for creating a line drawing with mild shading and smudging, like usually happens when using watercolours.
Felt Pen Drawing Preset
This one is very straightforward. The Felt Pen preset converts the photo into a drawing, but with felt pen strokes instead of just pencilled lines. This style highlights the borders, giving you a clean line drawing without much hatching or shading like in the Simple preset!
Photo To Line Art Examples
To make things easier for you, we'll discuss a few examples of changing a photo into a drawing. You can use this as a reference to begin your own editing!
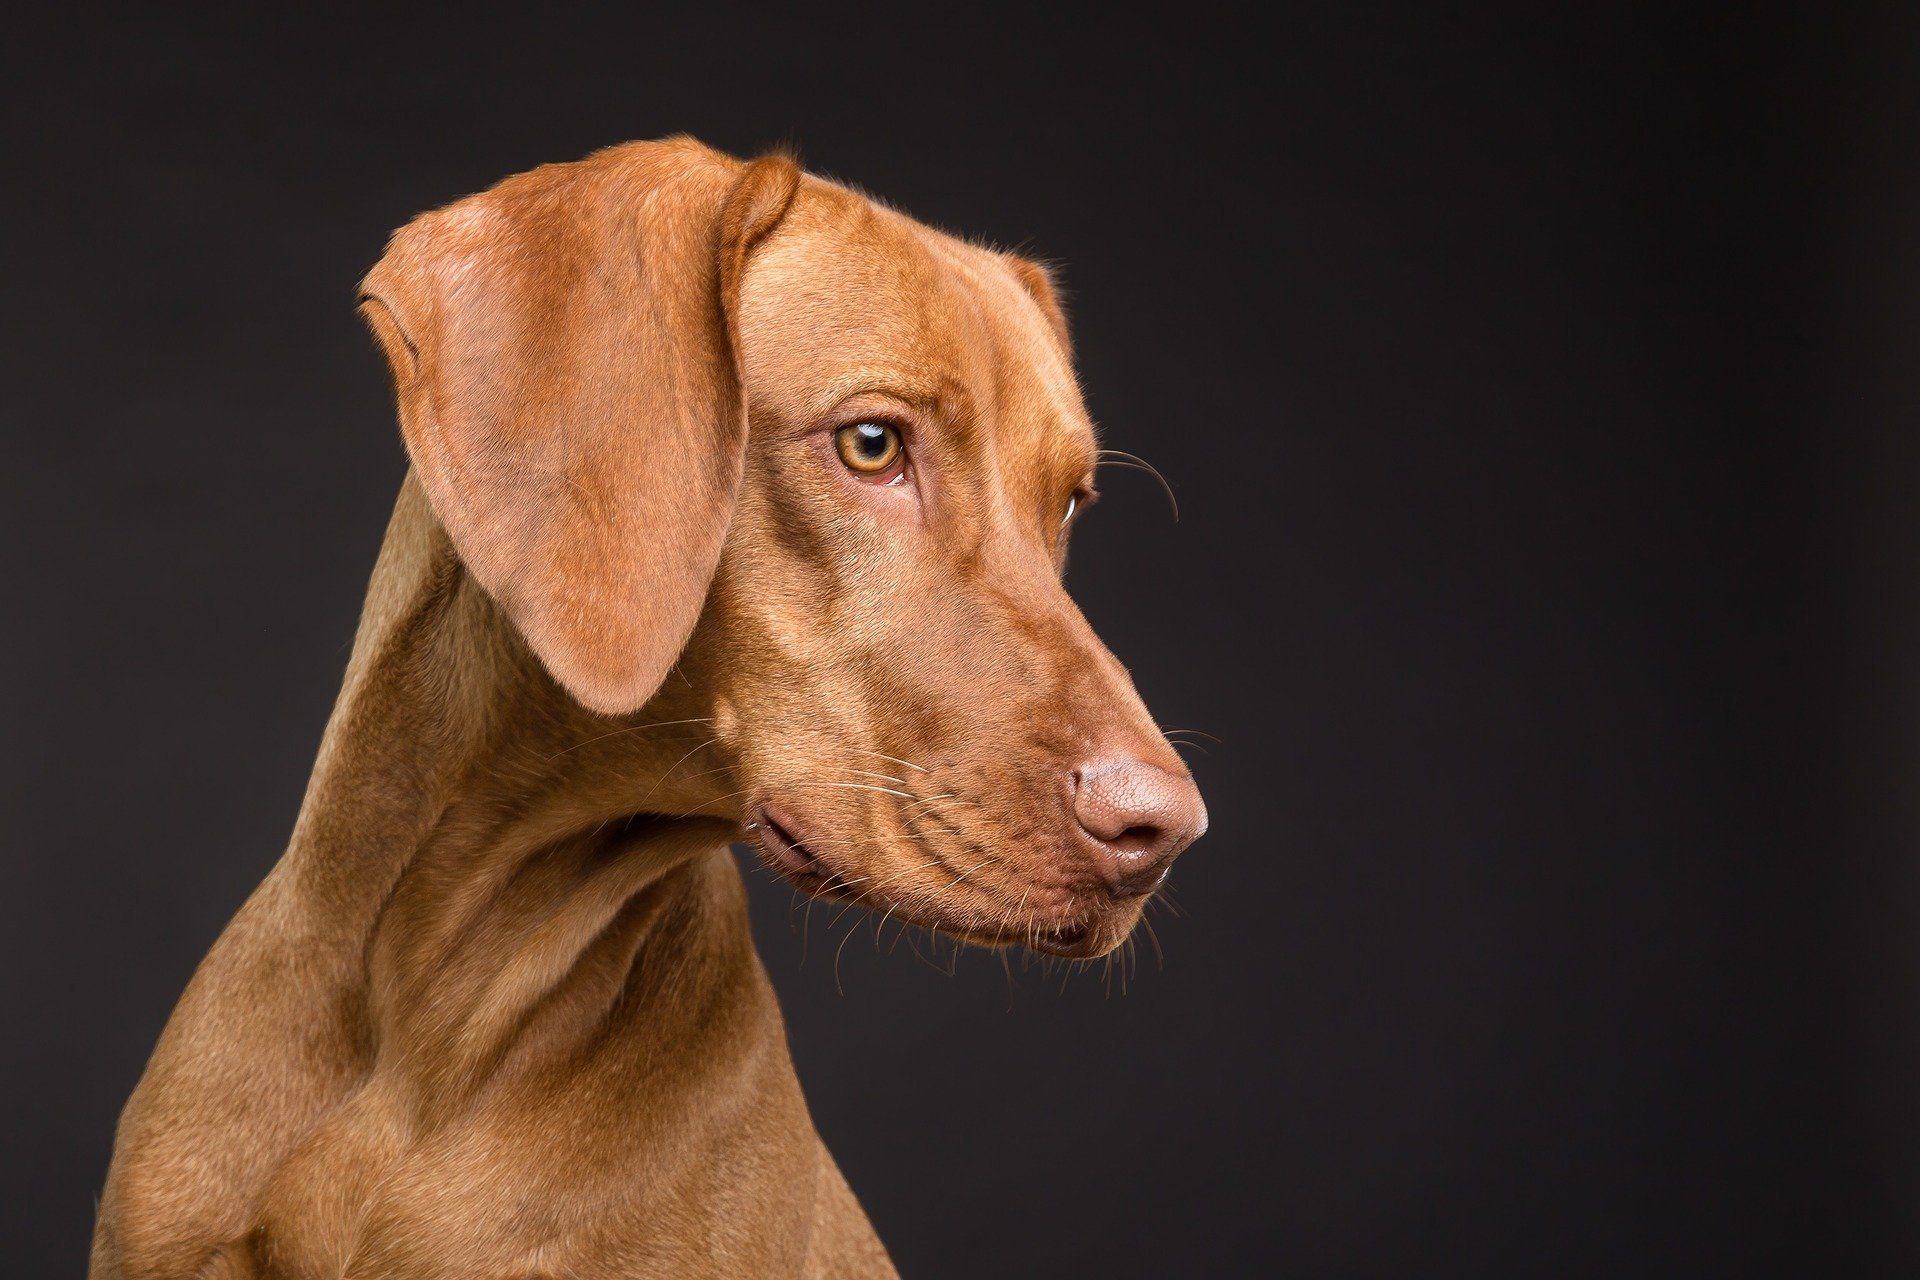
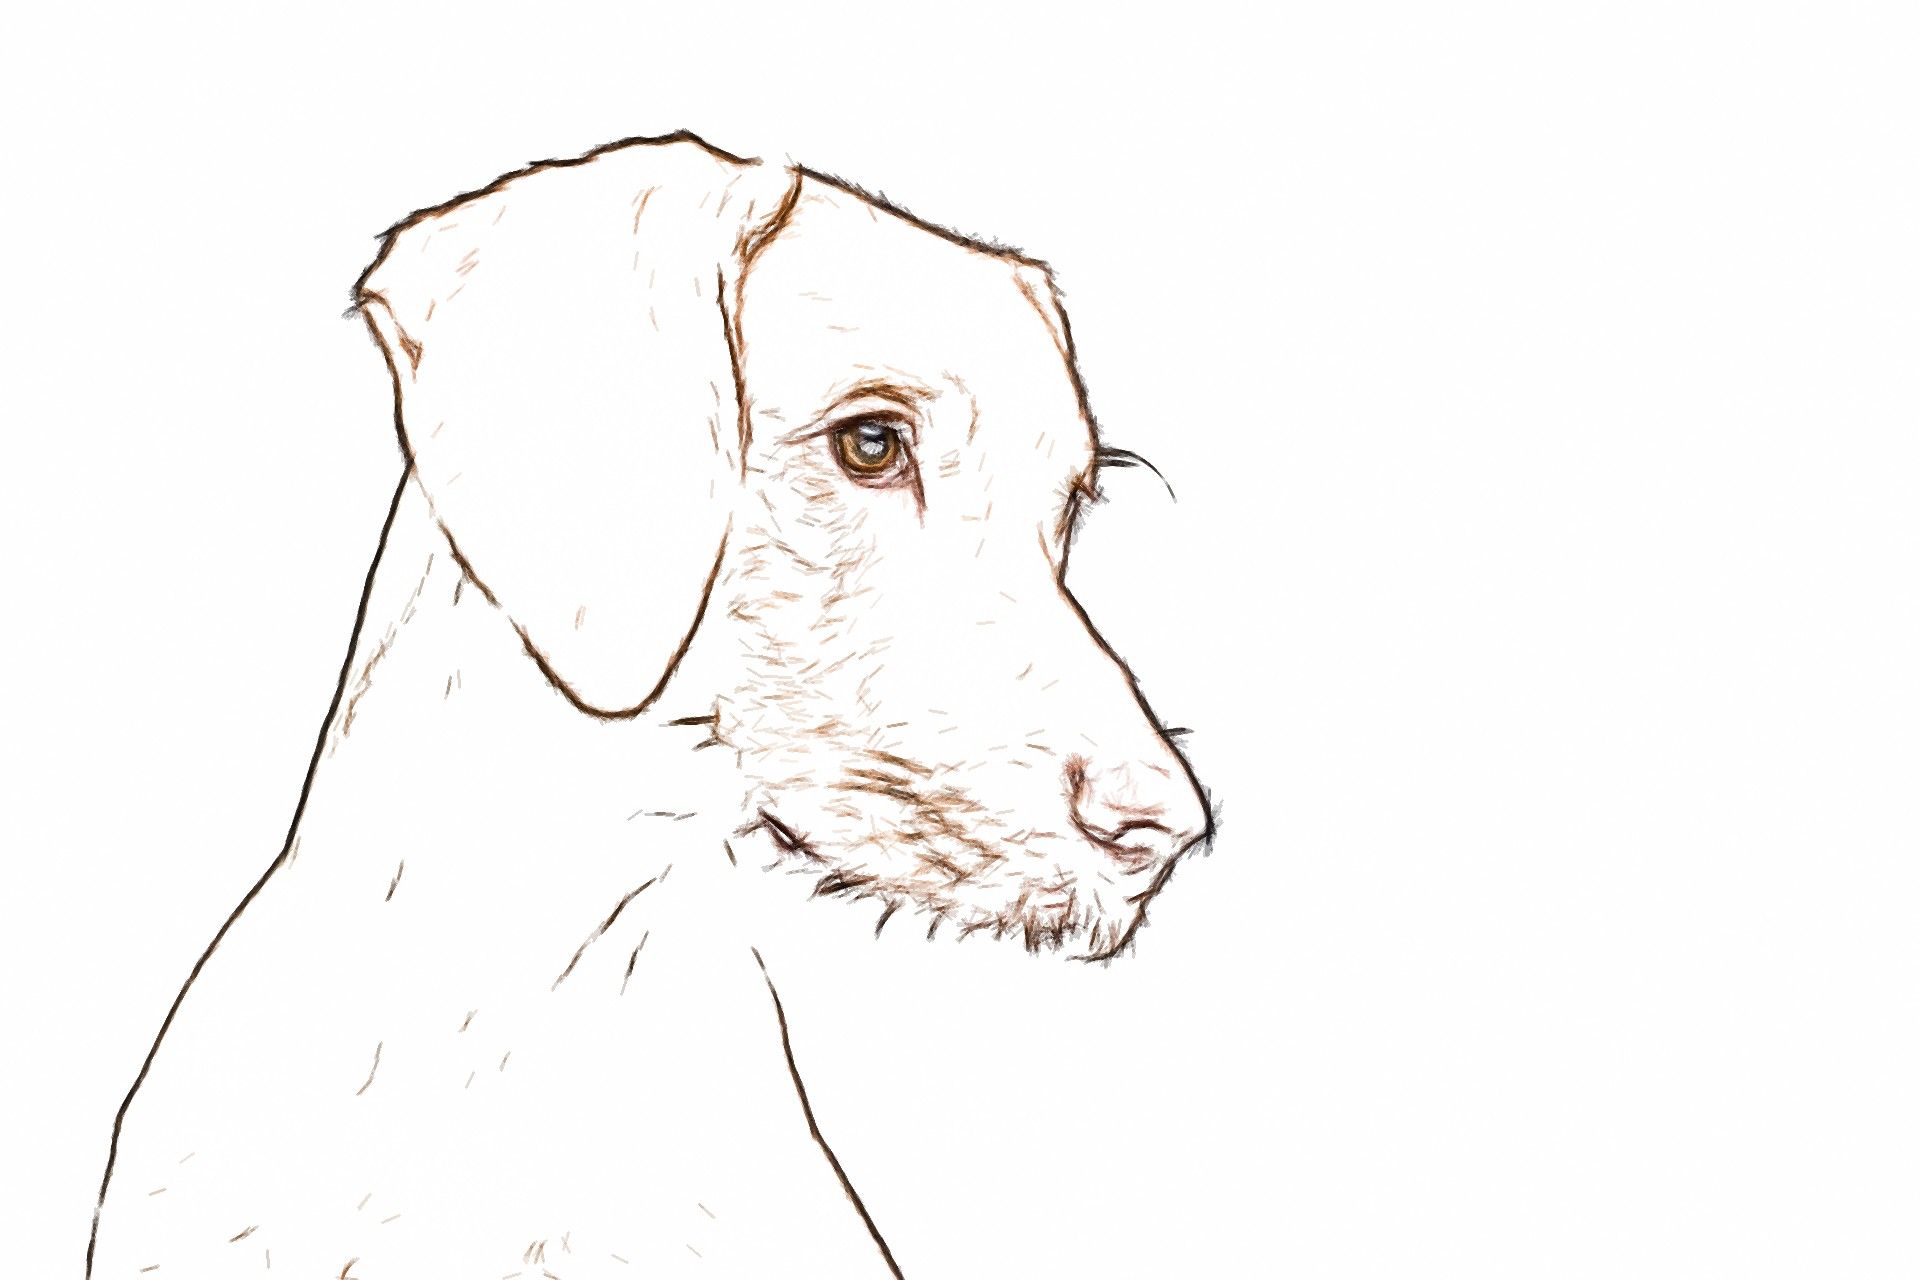
Animal Line Drawing
While the final choice is completely yours, you can follow a few basic tips to convert your wildlife photo into a line drawing.
Because you need to preserve the outline of the animal and details like fur, eyes and the surrounding grass and trees, you can use the Detailed Sketch conversion style.
For shading, you should be careful not to increase the hatching and stroke thickness so much that it becomes distracting from the outline of the animal. With some trial and error, it'll become easy to find the perfect balance between lines and shading!
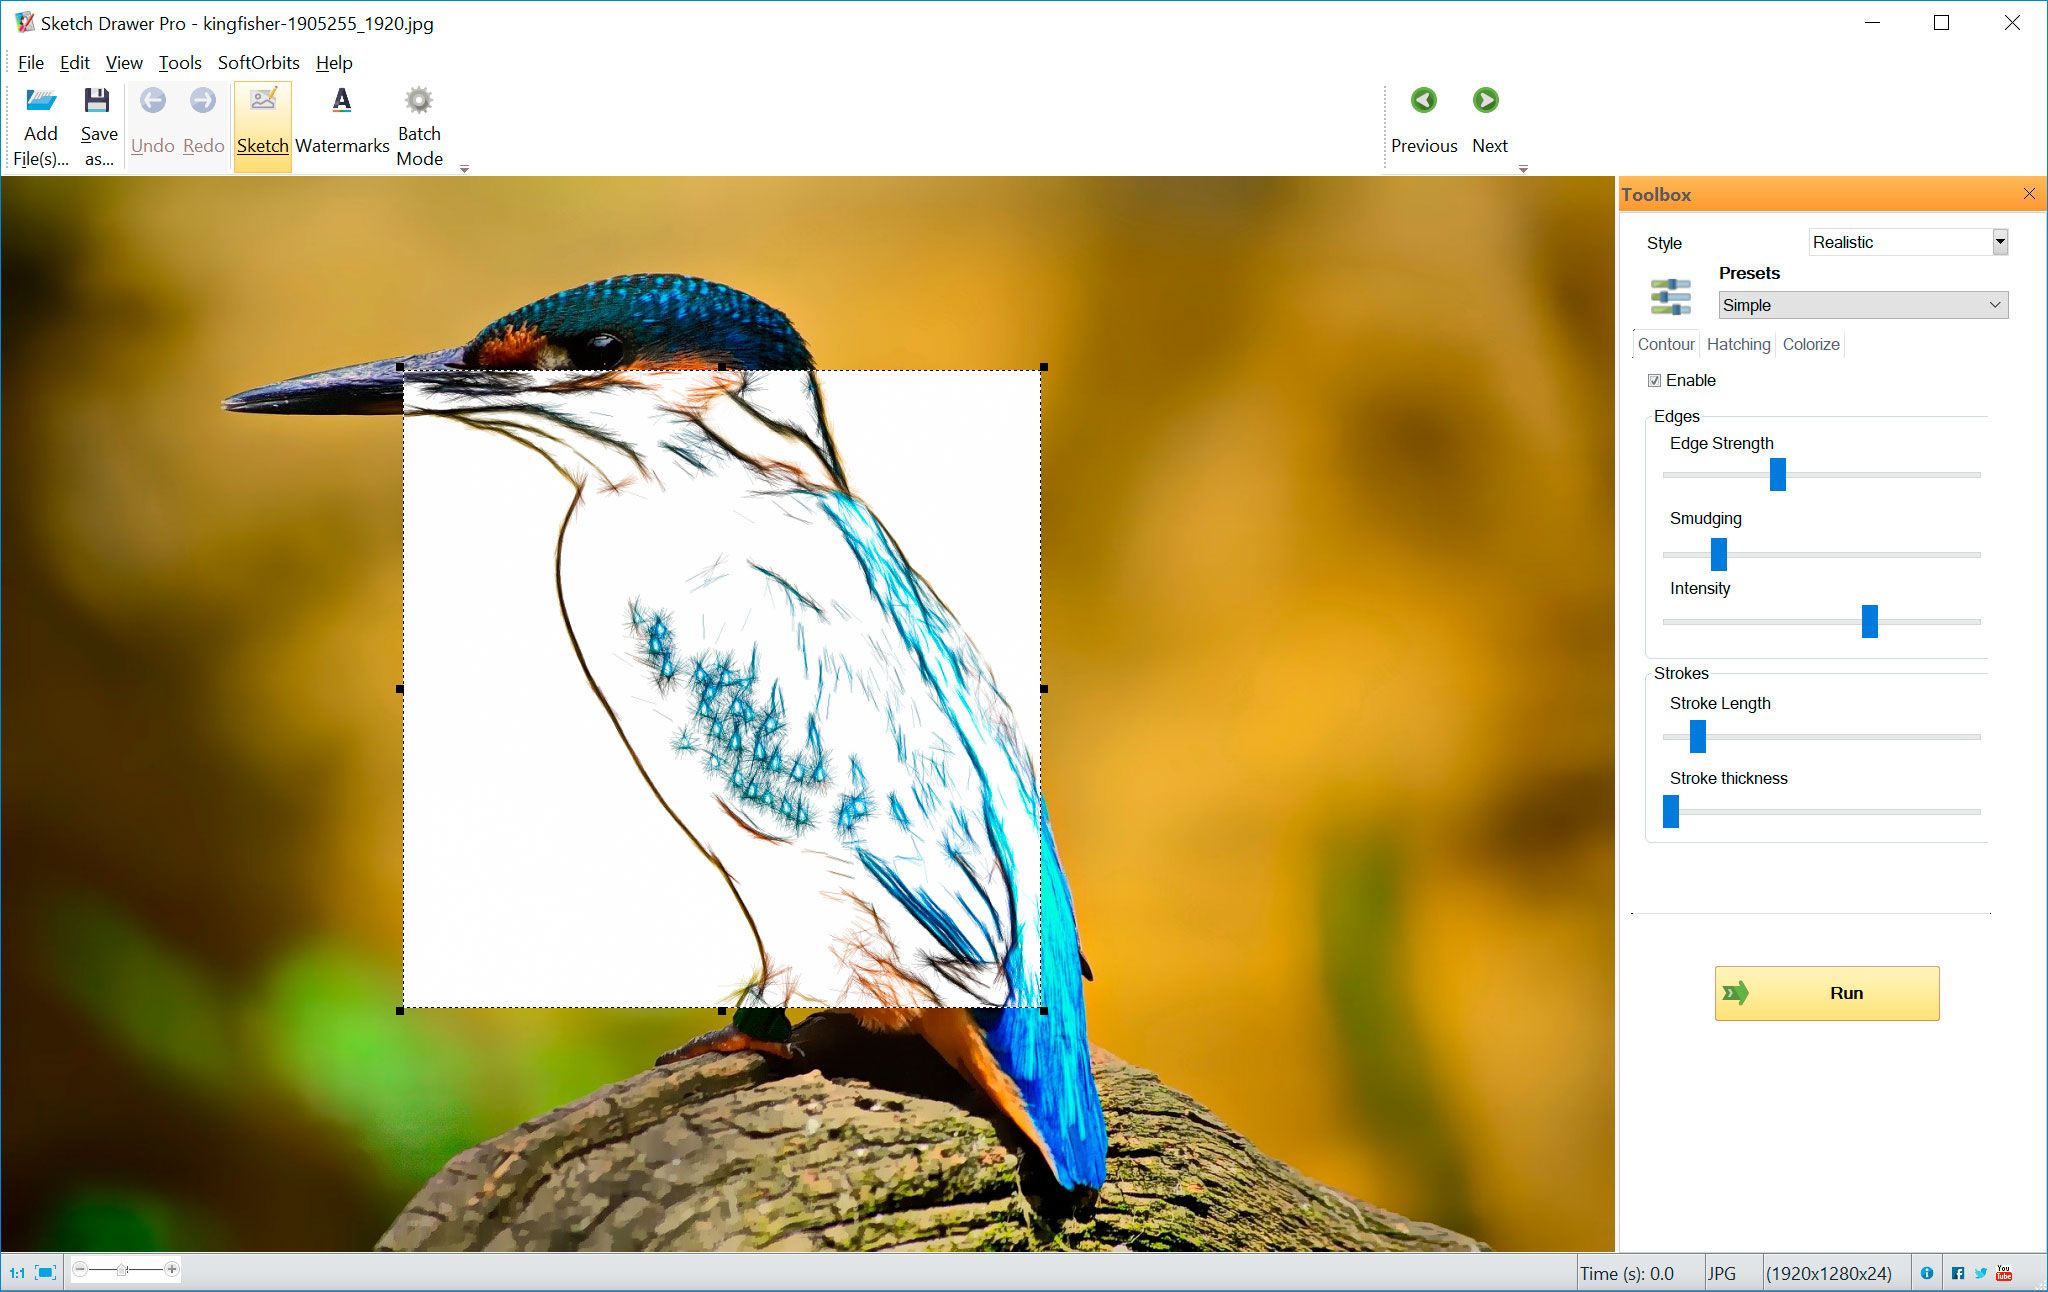
Bird Line Drawing
Bird photos are always special because of the unique shape of the wings and the brilliant colours in each feather.
That's why it is best to use the Classic or Realistic style along with the Colour Drawing preset.
This will help you create a natural-looking borders without lots of random shading, and also preserve the colours of bird's feathers!
If you want to capture a lot of detail in the feathers and emphasize the changing light, you can go with Realistic. With Classic, you'll get a minimalist sketch that will look more like an actual hand-drawn sketch, but without capturing all the light and shadows unless you enable hatching.
Tree Line Drawing
Trees have the highest amount of detail and texture, especially because of the small leaves, flowers and branches. Creating a tree line drawing from a photo will require you to preserve all those details, which means using the Realistic style of Detailed Sketch style would be better.
You can also choose the Pen preset, as the fine lines of a pen stroke will ensure that all the leaves look distinct from each other, and there's no blurriness or smudging!
How to turn photos into line drawings online?
If you cannot download the SoftOrbits Sketch Drawer software, no worries!
There are many online photo to sketch converters available, that too for free. Here are the best ones you can use easily!
Image ONLINE.CO - Pencil Sketch Your Photo
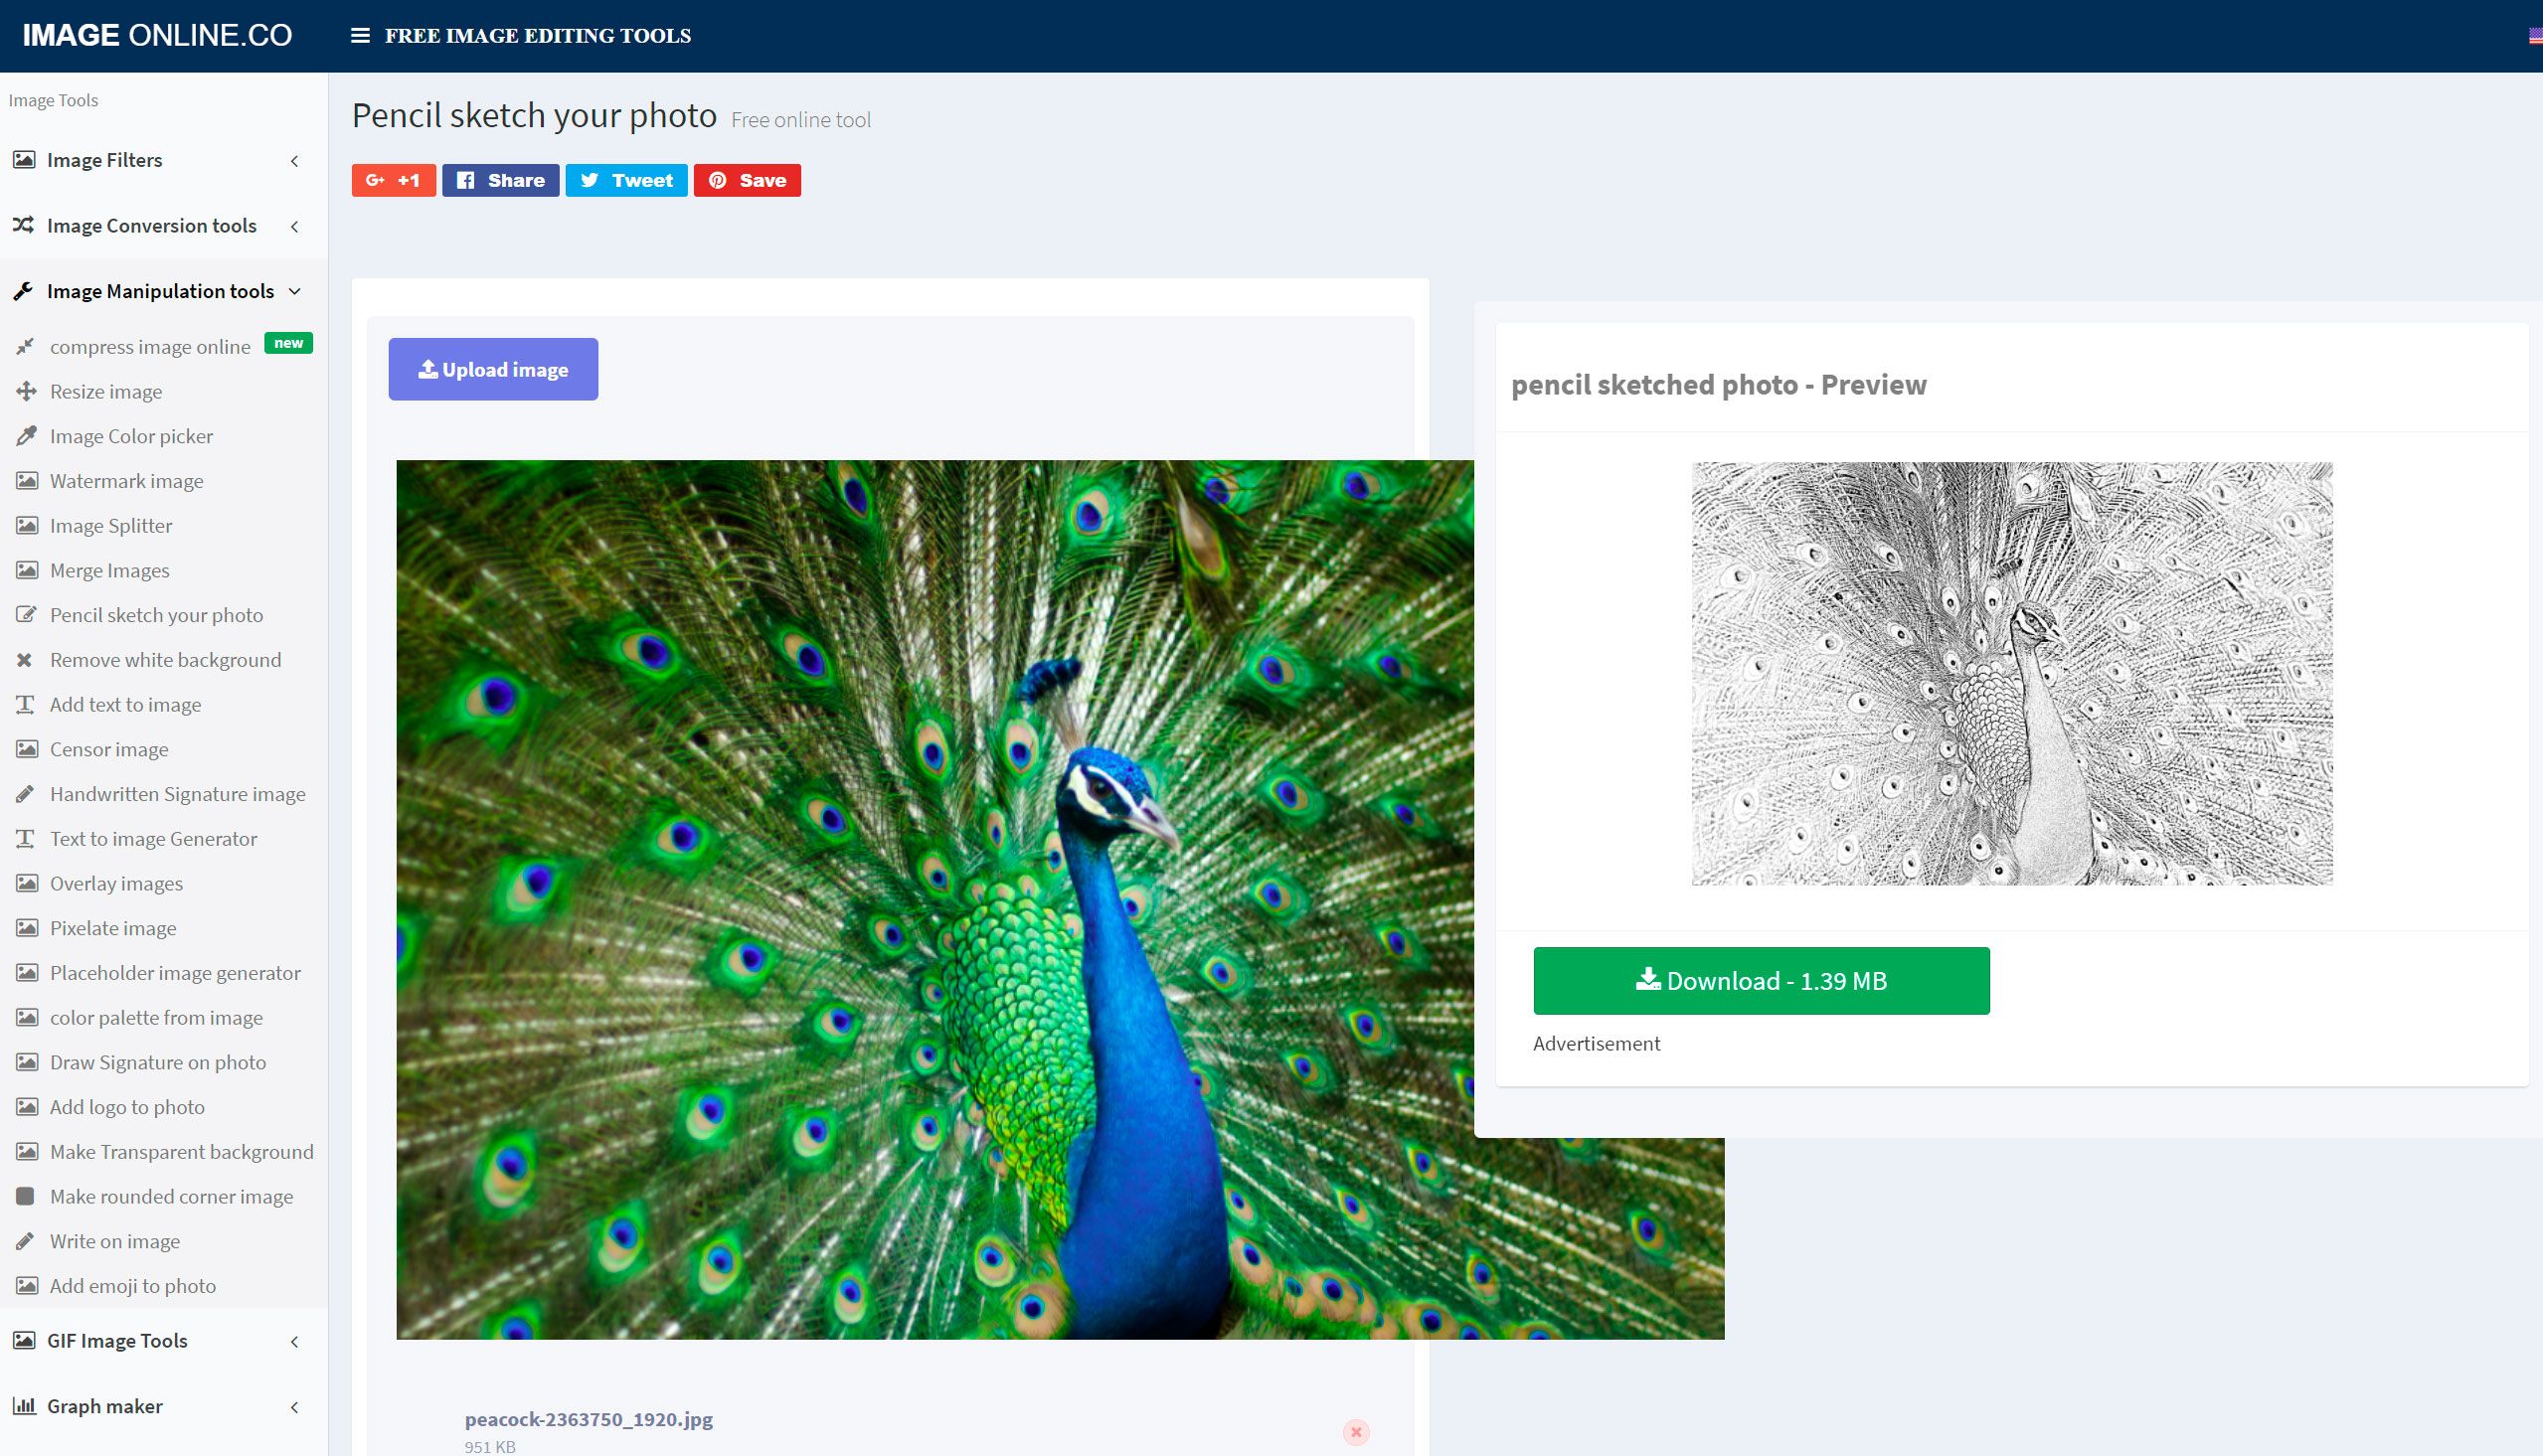
Online.co is the first of the list because you literally don't have to make any adjustments or selections. This free online program is very user-friendly, and all you have to do is upload your photo and click on Pencil Sketch!
The program automatically detects the outlines of your subjects and converts them into pencilled lines, while also turning shadows into dark shaded areas.
LunaPic
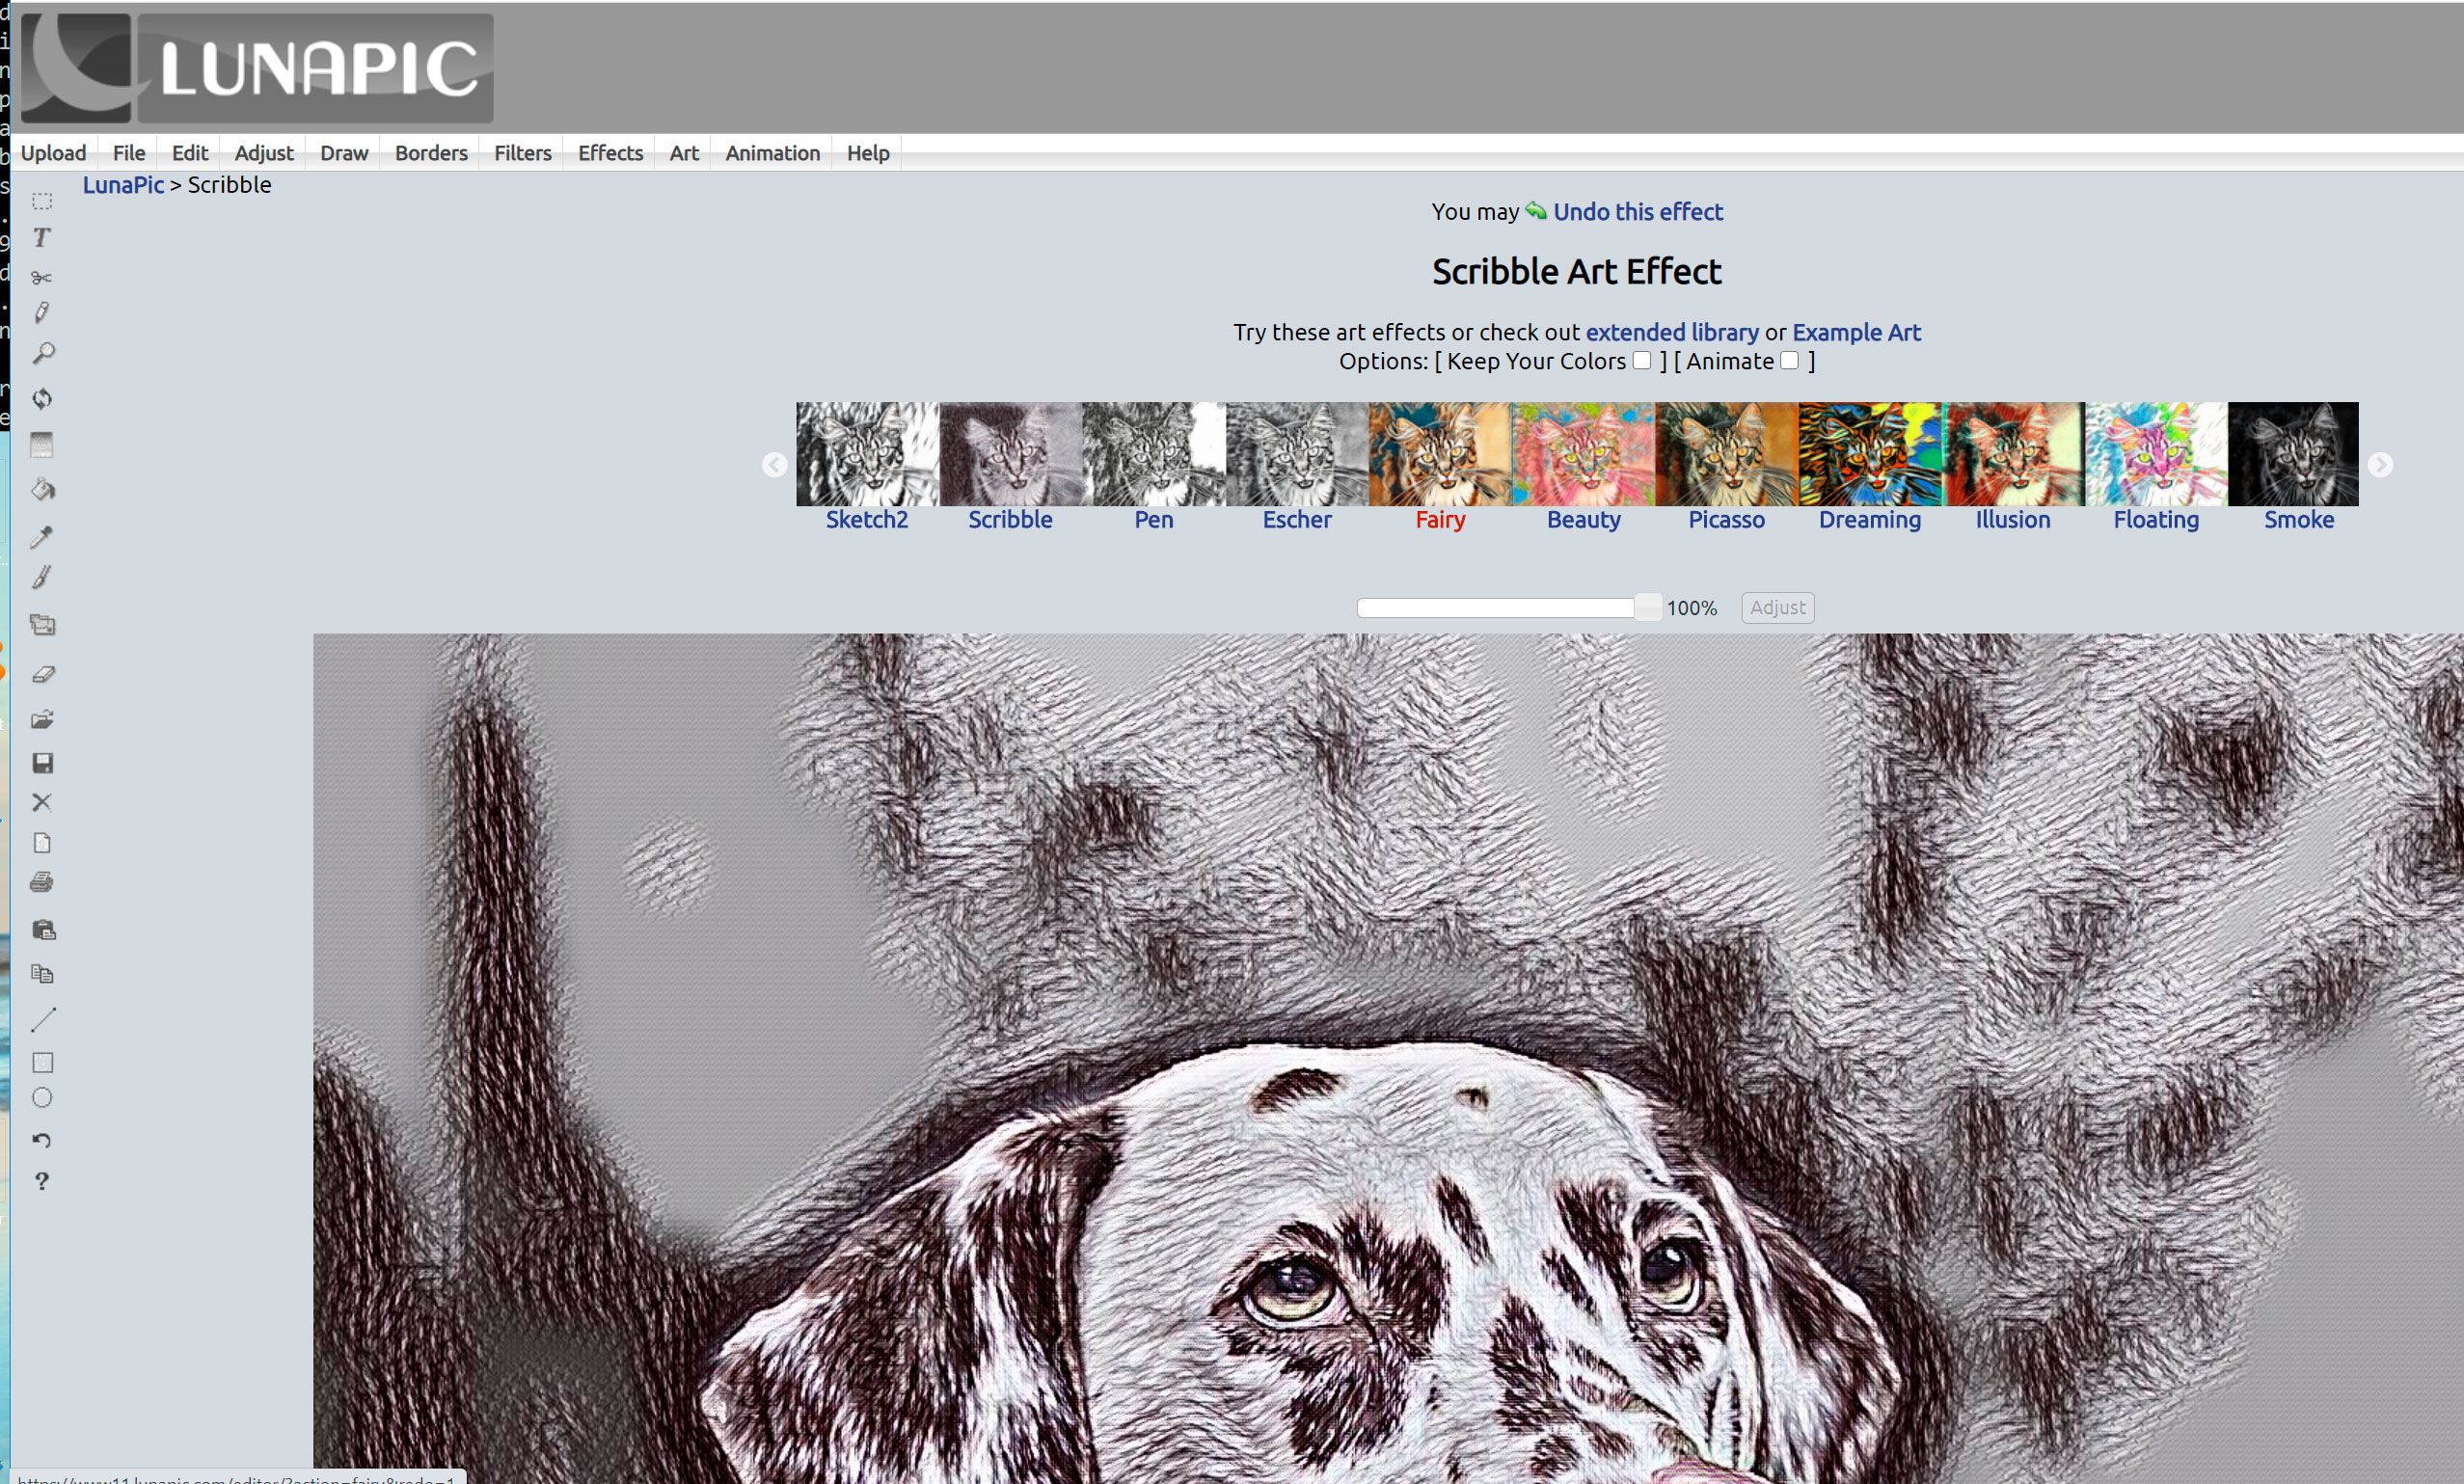
LunaPic is actually a full featured program with many options like photo blending, collage-making, colour filters etc. One of these options is Pencil Sketch, which also has a colour version.
After turning on this online program, upload your image using the option in the toolbar. Once the upload is finished, you can simply click on the Effects button, and choose what type of sketch you want. Apart from Pencil Sketch, you can select Colour Pencil Sketch or Surreal Painting!
The program will directly start the conversion and have your sketch ready in a few seconds.
Snapstouch
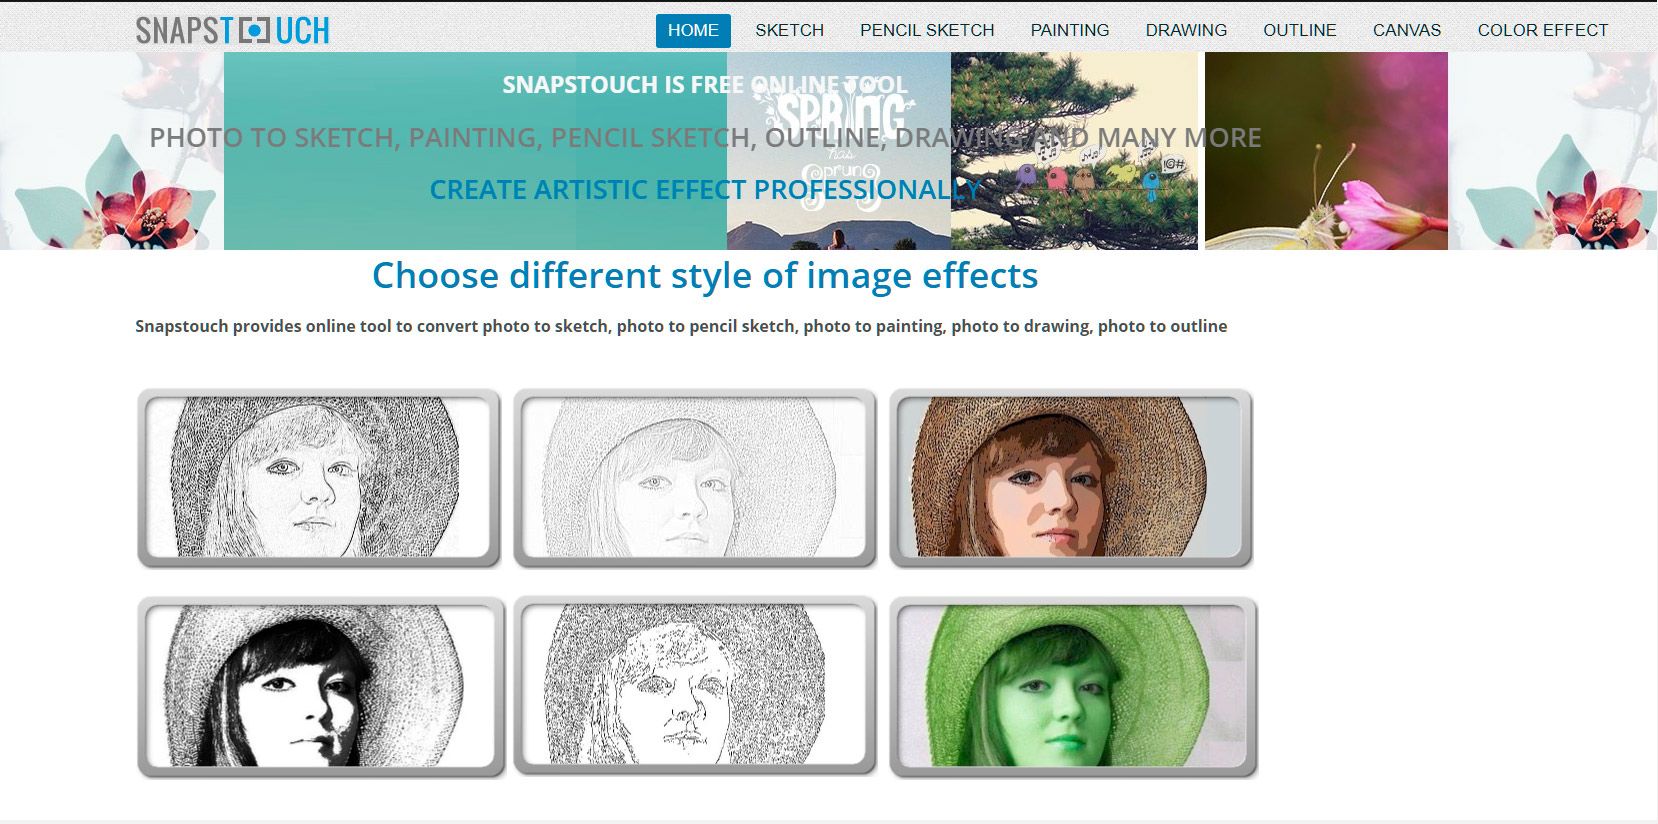
Snapstouch is another free online tool, where all you have to do is upload your image and select the colour of the pencil. It does not offer many adjustments, but you have the option of selecting a red, blue or green pencil, or a combination of any two of these colours.
The converter software will automatically analyse the image and create the drawing for you.
How to convert a photo into a line drawing in Photoshop?
In case you are already familiar with Photoshop, you can follow these steps and convert an image into sketch on your own.
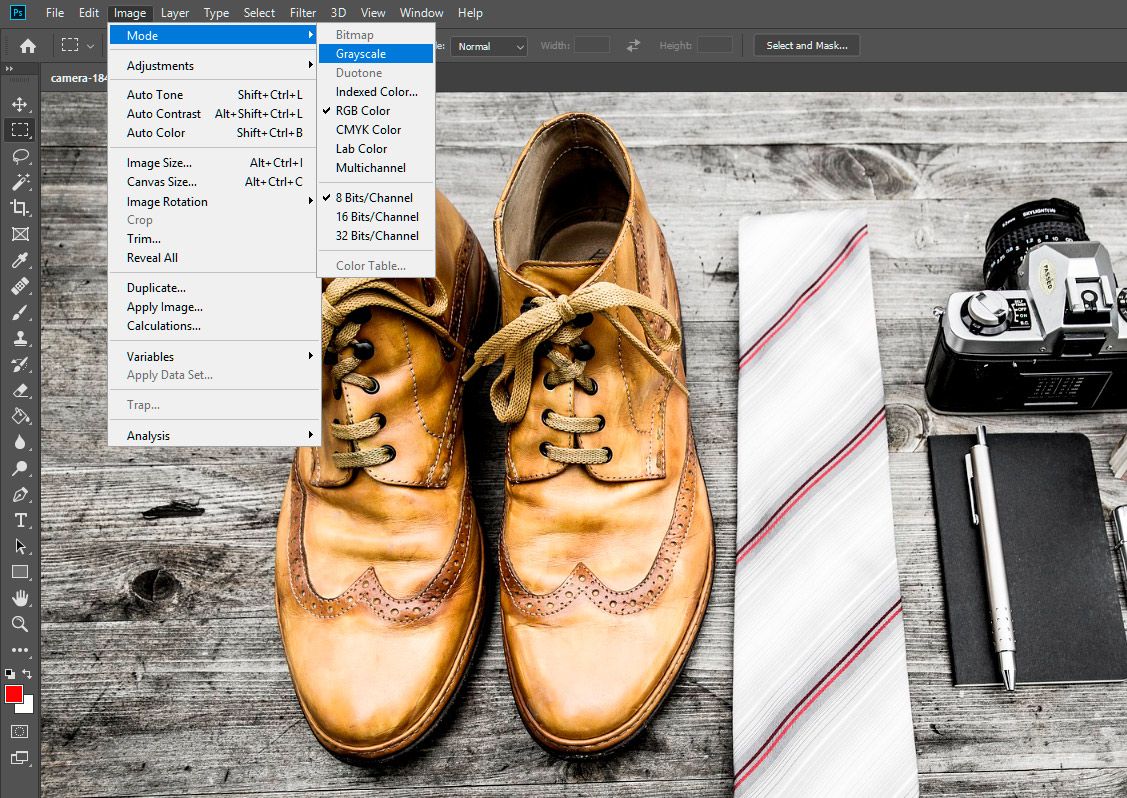
Change image to grayscale
First remove all colour from the image by reducing saturation, or selecting Image > Mode > Grayscale from the Photoshop toolbar.
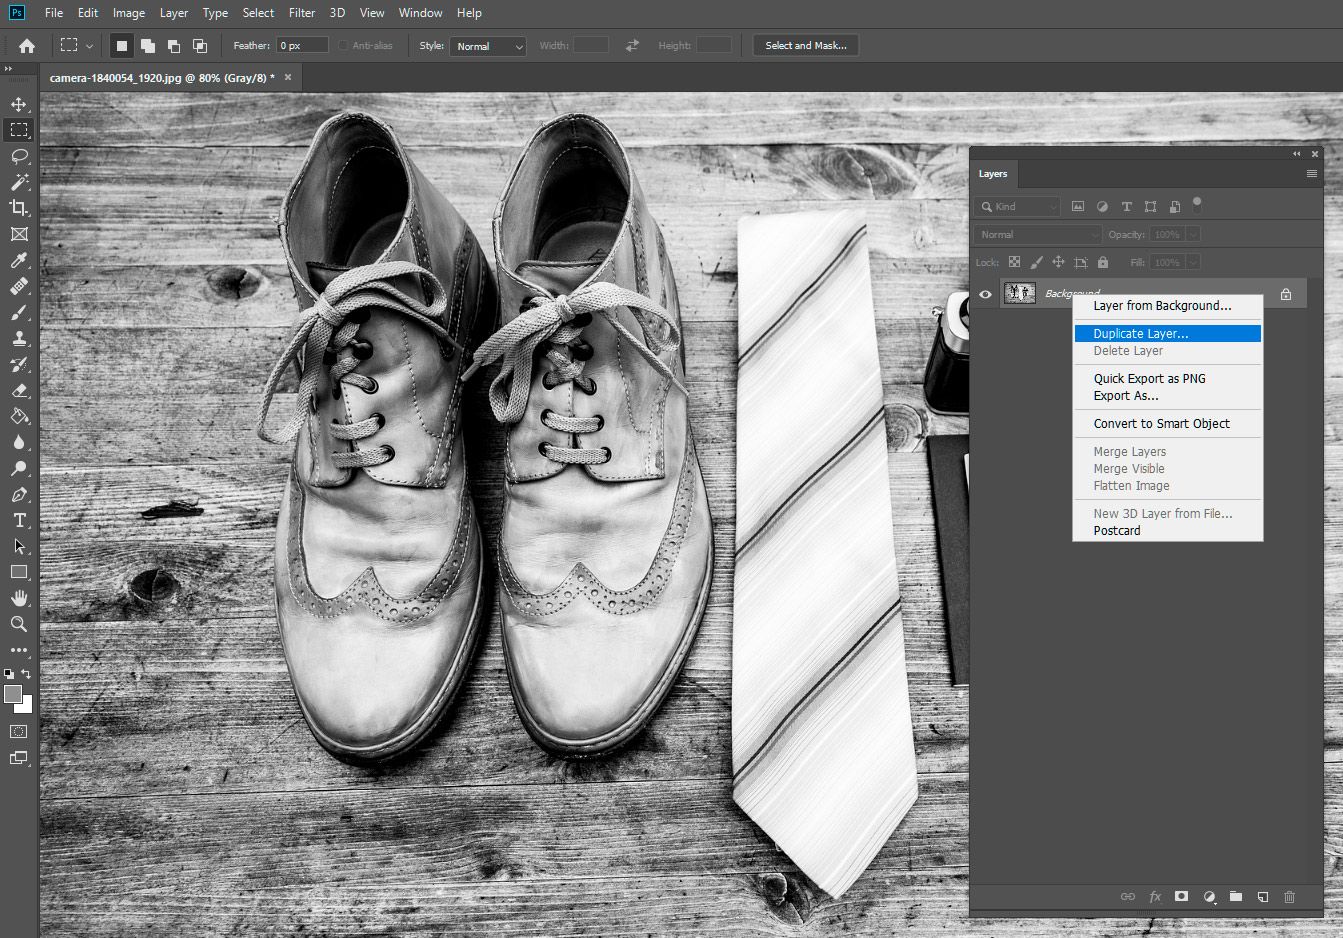
Duplicate layer
Create a copy of the layer by dragging it into the New Layer. You will now have the original background, and a background copy layer.
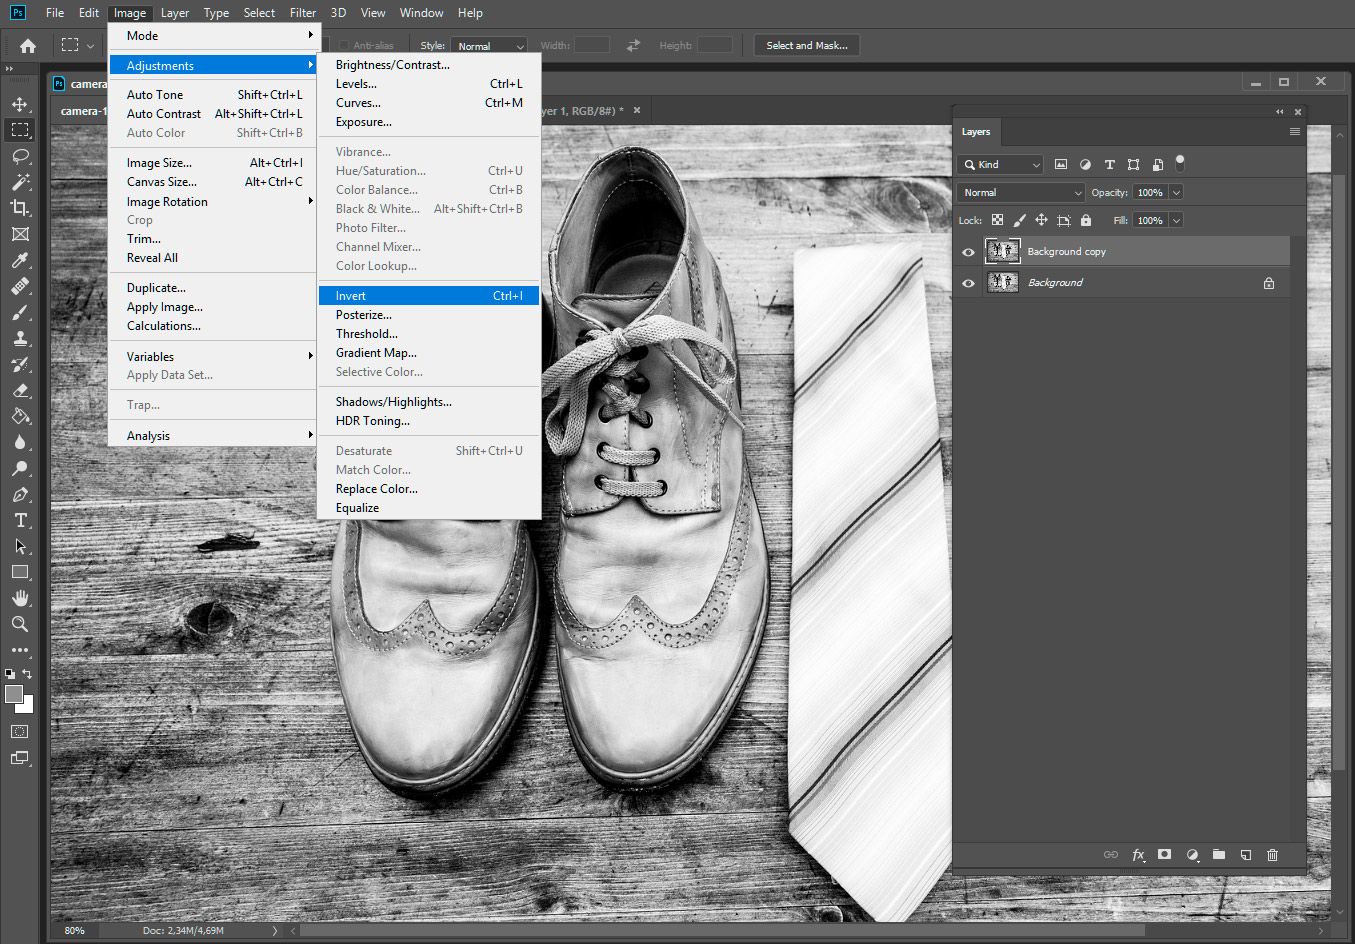
Invert layer
Go to Image > Adjustments > Invert. This will reverse the lighting in the image, making the bright areas dark and dark areas bright.
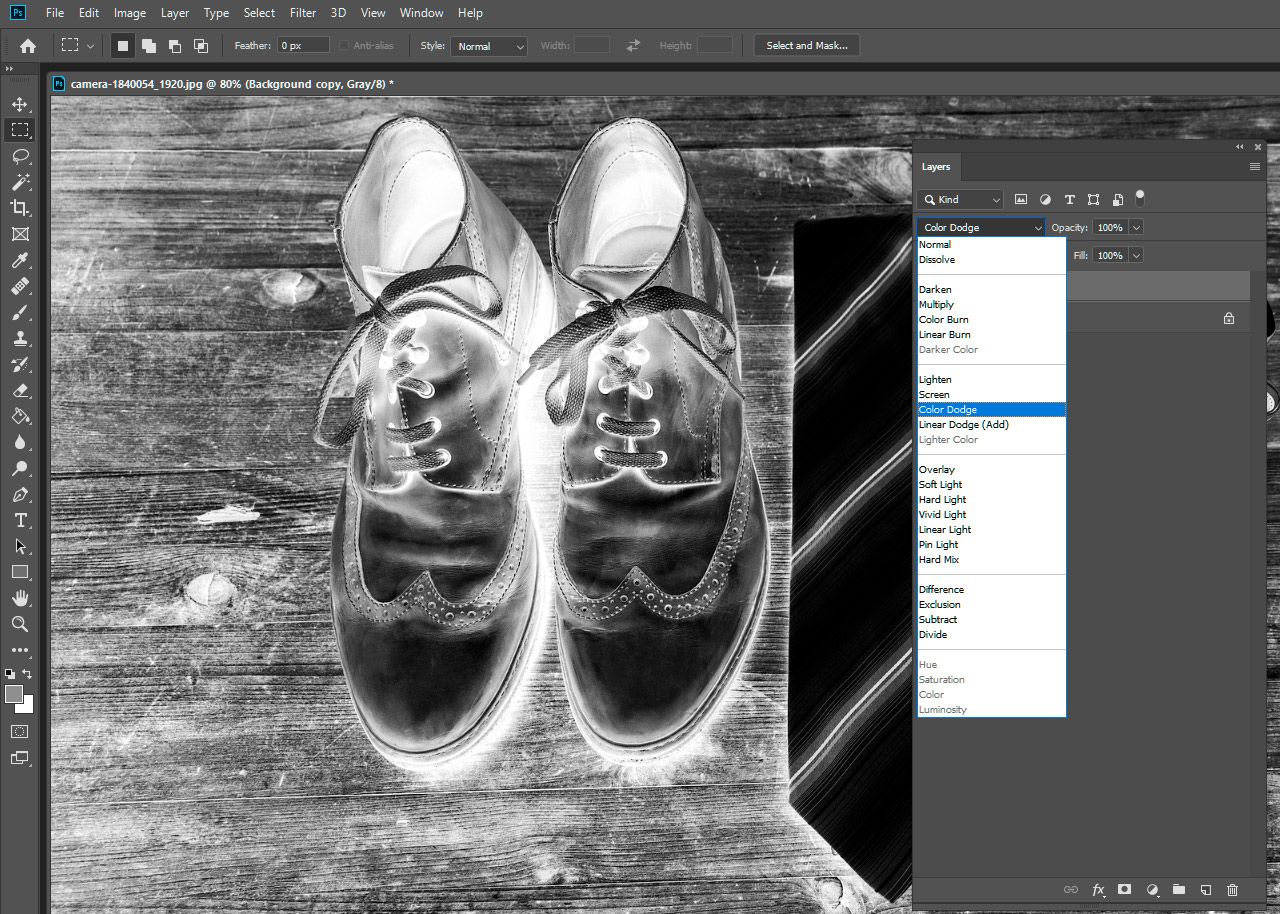
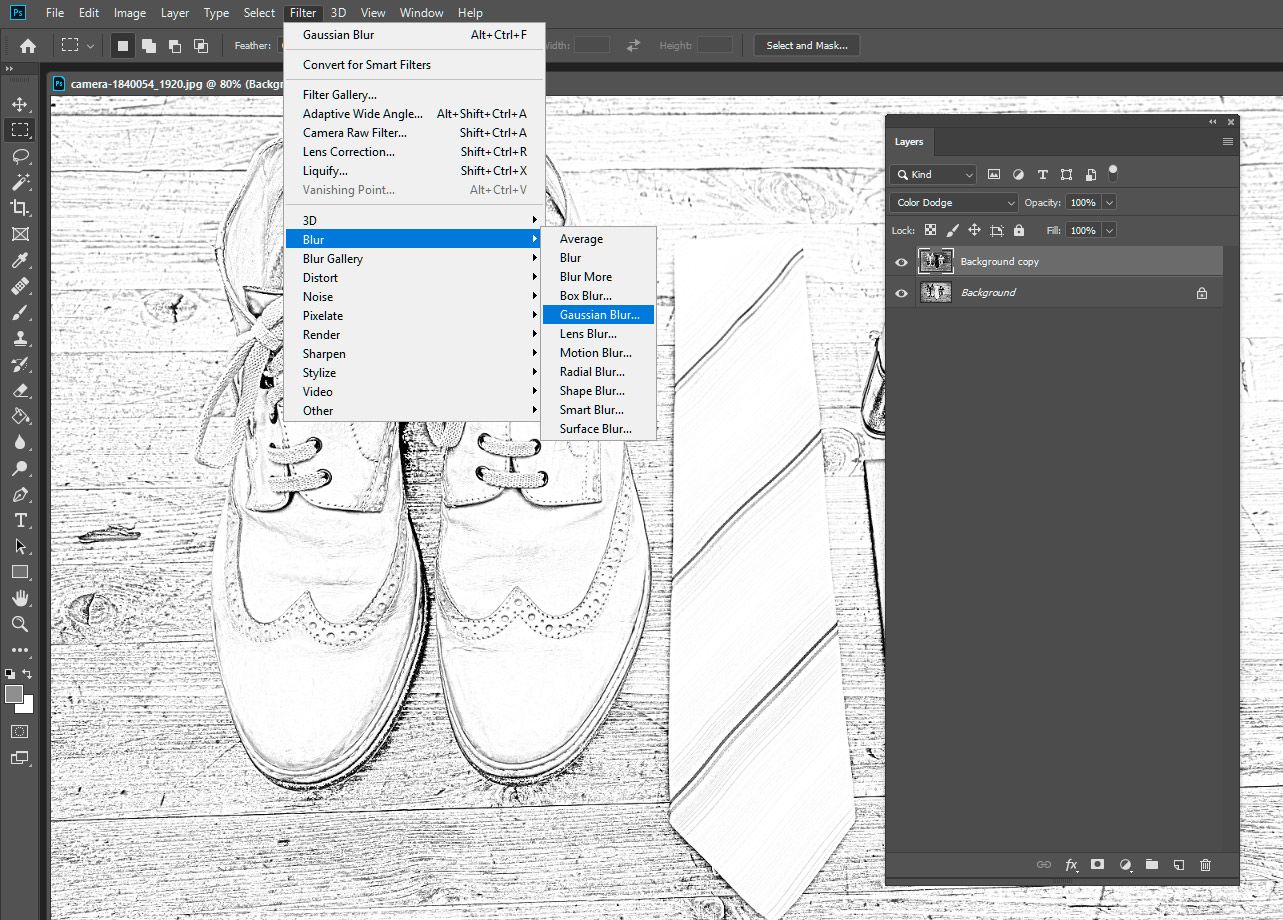
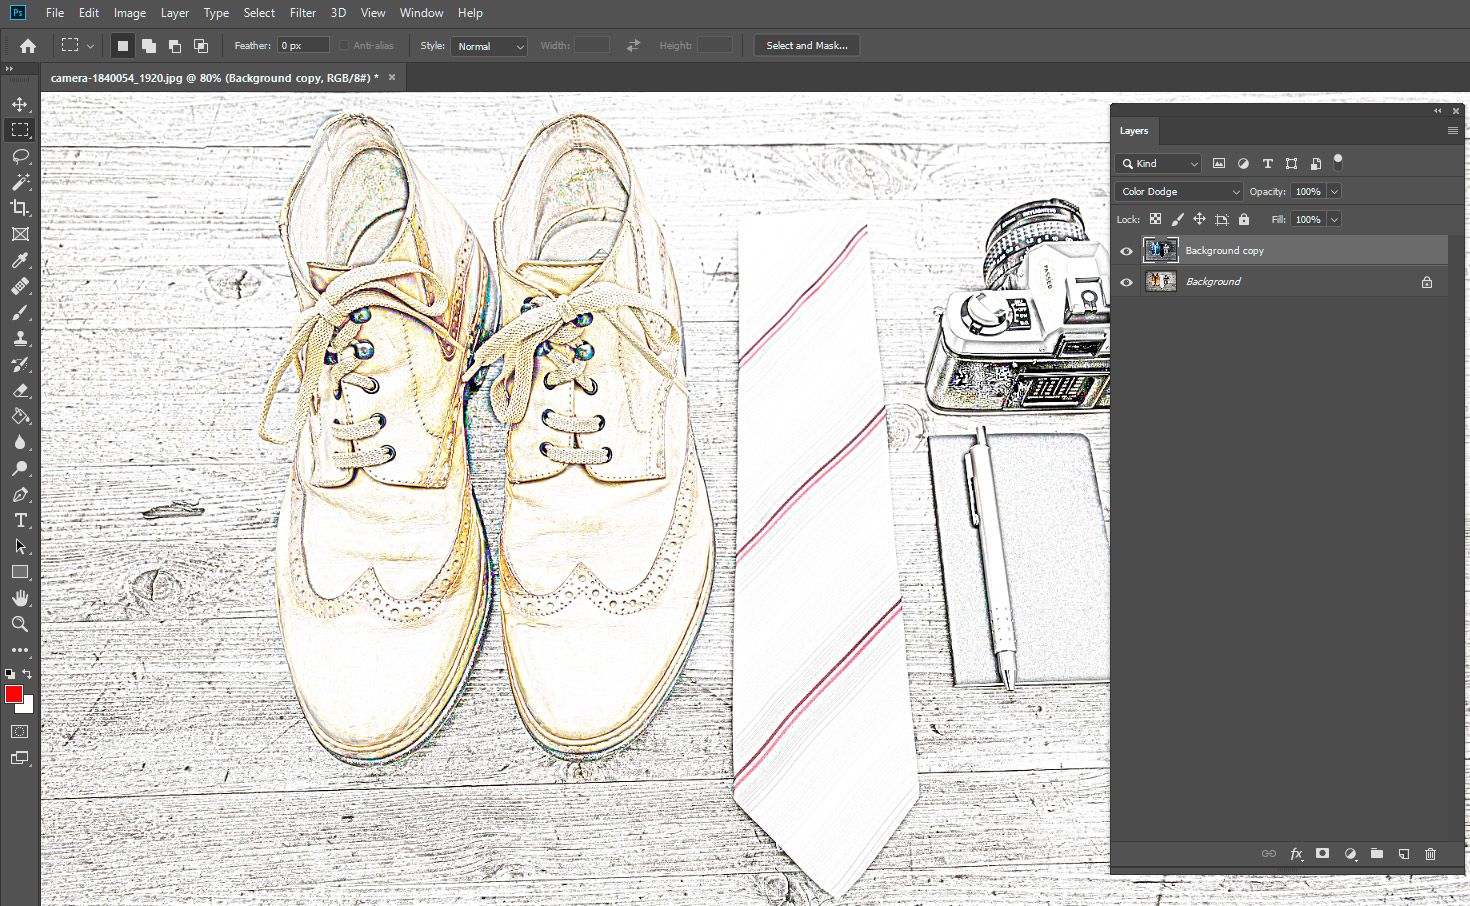
Colour dodge
Click on the Layers panel. You should see the Blend Mode as Normal. Change this to Colour Dodge. This will turn your photo almost completely white!
Apply Gaussian Blur
From the dropdown menu in the toolbar, select Filter > Blur > Gaussian Blur. Keep adjusting the slider until you are happy with the effect. You should also adjust the radius size to change the thickness of the lines. A lower radius creates a more pencil-like effect!
Adjust thickness if needed
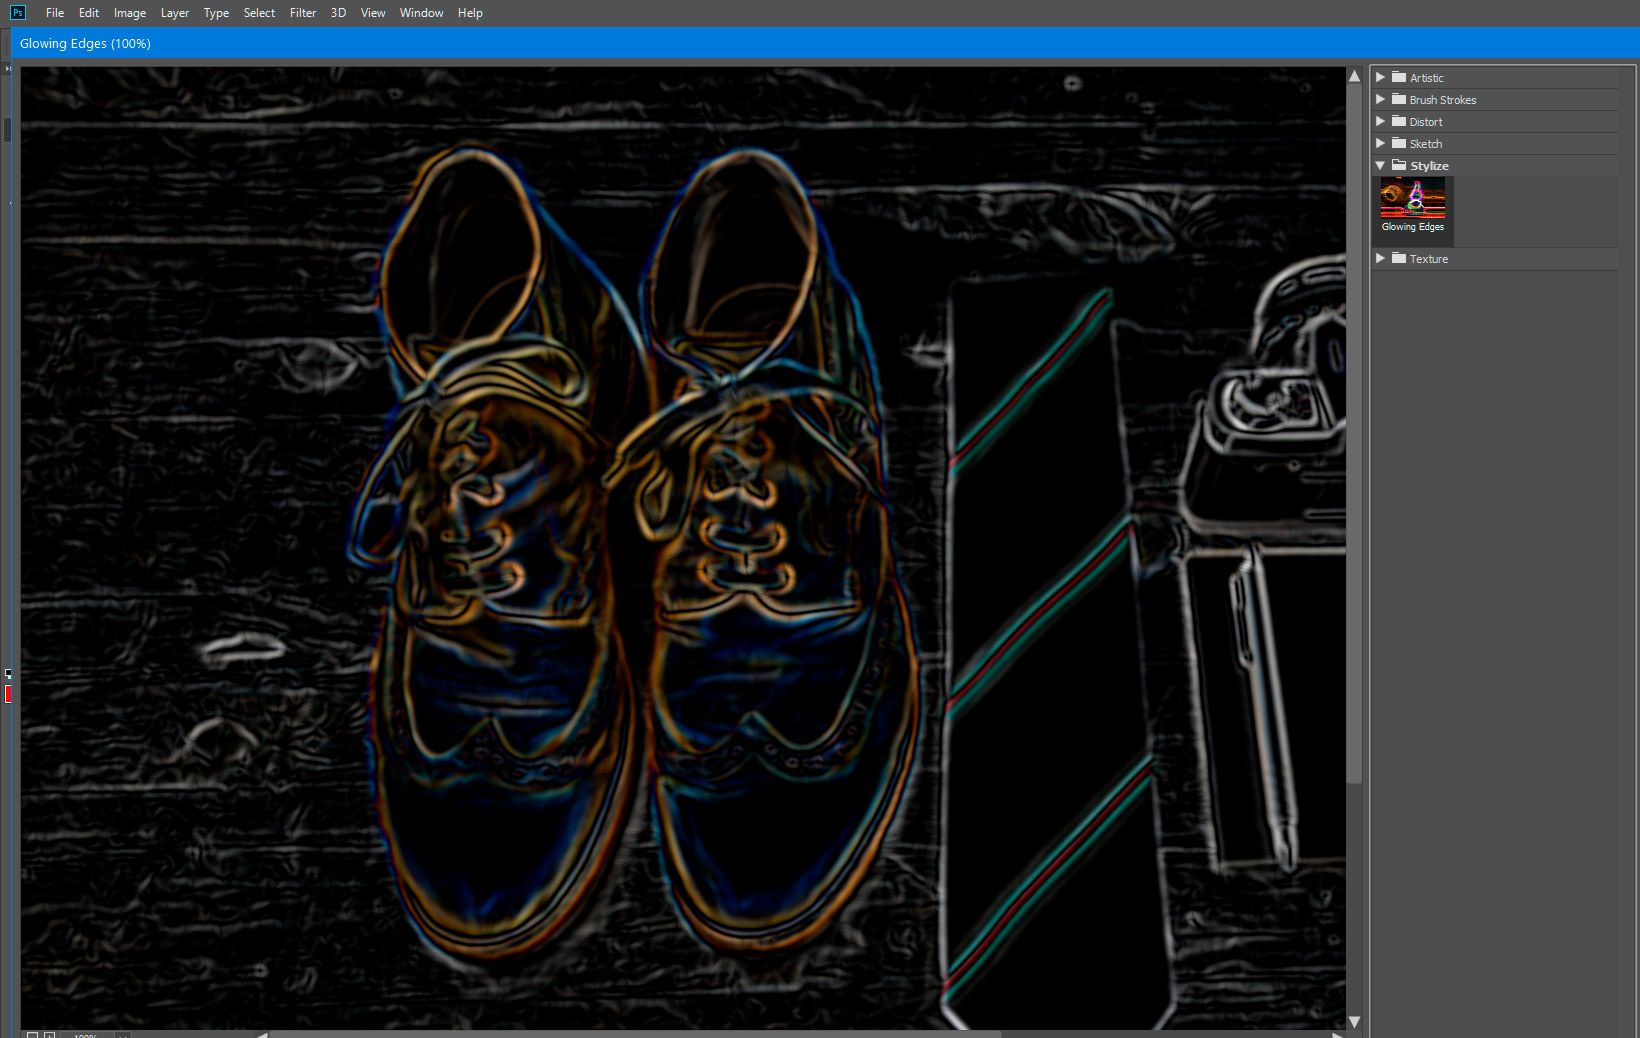
For a simple sketch, Step 5 is all you need! But if you want to create a sketch with thicker outlines, you will first have to duplicate your original layer once again, and keep it on top as the 3rd layer.
Now, choose Filter > Filter Gallery. Here, you will see a Stylize option, under which there is a Glowing Edge option. Adjust the edge thickness and edge brightness as you wish!
By slightly increasing the width and reducing the brightness, you will see bolder lines in your final image.
Save image
That's it! You should have a nice pencil sketch of your photo ready.
There are many other options under the Filters tab, like Torn Edges, which you can try to add more effects and shades in your final photo.
What are the best apps to convert photos into drawings?
Most of our family photos and selfies are on our smartphones. This is why it is great to have a few apps handy for quickly converting images into sketches.
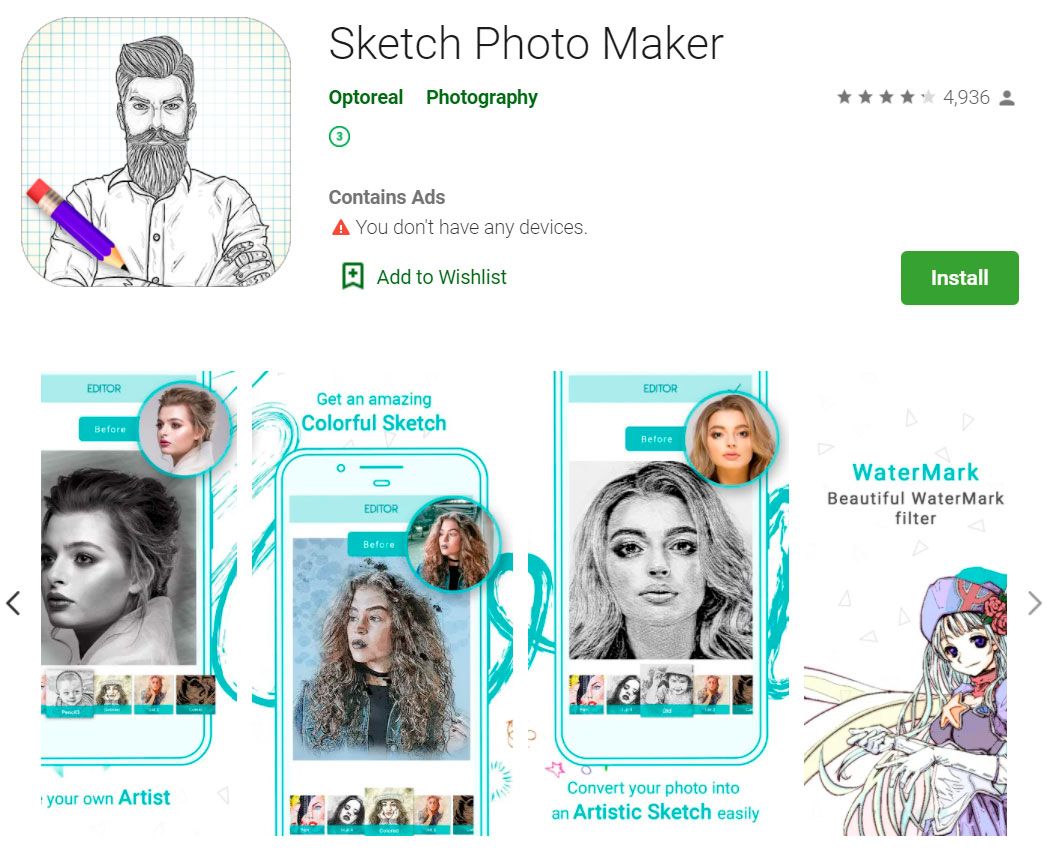
Photo Sketch Maker
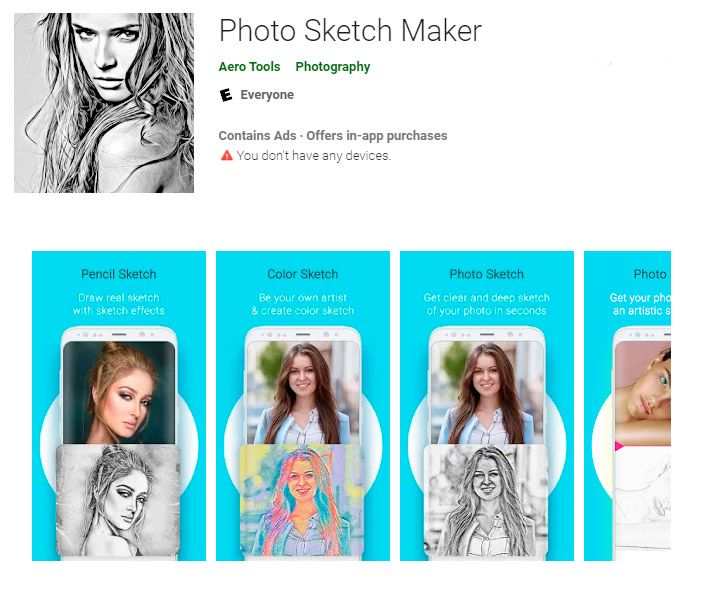
Sketch Photo Maker is a free app to convert any photo in your phone into a pencil sketch. Apart from the usual black and white pencil, you can choose from effects like colour pencil, oil painting and hard pencil.
Once the chosen effect is applied, you can add smooth drawing effects, crop the photo, or directly share it with your friends!
Optoreal Sketch Maker
The Optoreal Sketch Maker is a free app available for Android smartphones, and gives options like pencil drawing effect, colour effects, oil painting and even cartoon style effect. You can also shift colours in the sketch, and turn it red, blue or green like a hip-hop album cover!
All you have to do is choose a photo from your phone gallery, and get started.
Pencil Photo Sketch Editor
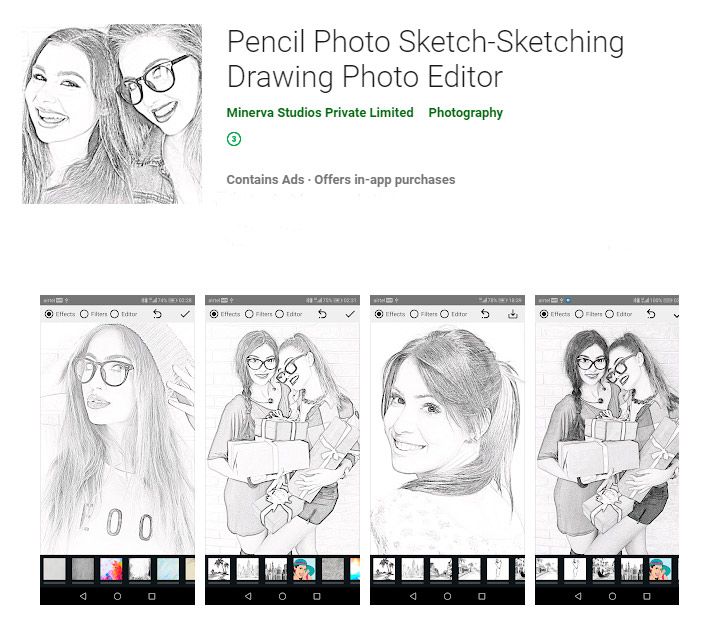
This app is yet another user-friendly program that lets you convert any image into a pencil sketch. The advantage of this app is that it offers more presets than the ones we talked about earlier!
Along with pencil sketch and painting effects, you get the option of converting your photo into a cartoon poster, or use crayon and wax effects and pop-art style presets.
🙋Frequently Asked Questions
❓ How to turn photo into line drawing using Illustrator?
There are many different methods to convert a photo into line art. You can check out a few videos on YouTube or go through a few blogs to understand the process.
❓ How to turn photo into line drawing using GIMP?
Like Photoshop, GIMP also allows you to use layers and Gaussian blur effects to create a pencil sketch of images. The GIMP organization itself has a tutorial for this!
❓ How to convert photo to line drawing using Paint Shop Pro?
PaintShop Pro is an excellent tool to convert images into drawings, especially because of its smart algorithms which do the job for you. Try out the process shown in this YouTube lesson!
Convert photo to line art in Illustrator
Convert photo to line drawing using Paint Shop Pro
Turn Photo Into Line Drawing Illustrator
Source: https://www.softorbits.net/how-to/convert-photo-to-line-art.html
Posted by: vanalstynerefustoo.blogspot.com
0 Response to "Turn Photo Into Line Drawing Illustrator"
Post a Comment